Pattern: Extract BI Publisher Data
Pattern: Extract BI Publisher Data
Background Information
Before we jump into this orchestration, we need to review some background information. Oracle exposes a web service which allows you to query any BI Publisher report or data model. While the link below is not specific to Cloud ERP, the WSDL's defined in the link below are available within cloud ERP as well, since BIP is used as a front end reporting tool for cloud ERP.
https://docs.oracle.com/cd/E28280_01/bi.1111/e22259/webservices.htm#BIPDV907
The WSDL that we want to focus on is the report service WSDL, which allows us to call and report or data model available in the BI Publisher Catalog.
WSDL: http://<host>:<port>/xmlpserver/services/v2/ReportService?wsdl
The concept is simple. You create a data model or a report within the application, and then you can call it from a web service. I won't get into the details about how you parameterize it or how you specify which template that you want to use, but all of that functionality is available, so RTFM. The part that is not so simple is how the data is returned. The below screen shot shows the simplest payload that I can send into the application to run a data model. We are only passing in the data model path, and the username and password.
<soapenv:Envelope xmlns:soapenv="http://schemas.xmlsoap.org/soap/envelope/" xmlns:v2="http://xmlns.oracle.com/oxp/service/v2">
<soapenv:Header/>
<soapenv:Body>
<v2:runDataModel>
<v2:reportRequest>
<v2:reportAbsolutePath>/Custom/Integrations/SampleExtract.xdm</v2:reportAbsolutePath>
</v2:reportRequest>
<v2:userID>............</v2:userID>
<v2:password>...........</v2:password>
</v2:runDataModel>
</soapenv:Body>
</soapenv:Envelope>
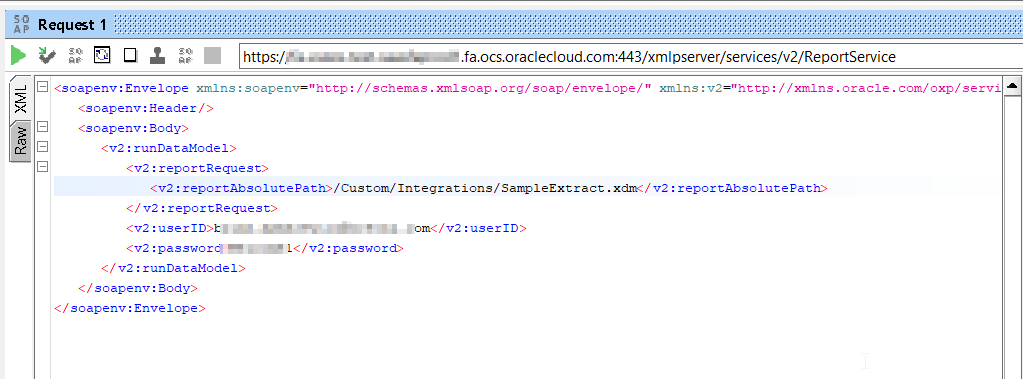
That will return the following data:
<soapenv:Envelope xmlns:soapenv="http://schemas.xmlsoap.org/soap/envelope/" xmlns:xsi="http://www.w3.org/2001/XMLSchema-instance">
<soapenv:Body>
<runDataModelResponse xmlns="http://xmlns.oracle.com/oxp/service/v2">
<runDataModelReturn>
<metaDataList xsi:nil="true"/>
<reportBytes>PD94bWwgdmVyc2lvbj0iMS4wIiBlbmNvZGluZz0iVVRGLTgiPz4KPCEtLUdlbmVyYXRlZCBieSBPcmFjbGUgQW5hbHl0aWNzIFB1Ymxpc2hlciAtRGF0YWVuZ2luZSwgZGF0YW1vZGVsOl9DdXN0b21fSW50ZWdyYXRpb25zX1NhbXBsZUV4dHJhY3RfeGRtIC0tPgo8REFUQV9EUz4KPEdfMT4KPENPTFVNTjQ+MTAwMDQ8L0NPTFVNTjQ+PENPTFVNTjU+MTAwMDU8L0NPTFVNTjU+PENPTFVNTjY+MTAwMDY8L0NPTFVNTjY+PENPTFVNTjc+MTAwMDc8L0NPTFVNTjc+PENPTFVNTjg+MTAwMDg8L0NPTFVNTjg+PENPTFVNTjk+MTAwMDk8L0NPTFVNTjk+PENPTFVNTjEwPjEwMDEwPC9DT0xVTU4xMD48Q09MVU1OMTE+MTAwMTE8L0NPTFVNTjExPjxDT0xVTU4xMj4xMDAxMjwvQ09MVU1OMTI+PENPTFVNTjEzPjEwMDEzPC9DT0xVTU4xMz48Q09MVU1OMTQ+MTAwMTQ8L0NPTFVNTjE0PjxDT0xVTU4xNT4xMDAxNTwvQ09MVU1OMTU+PENPTFVNTjE2PjEwMDE2PC9DT0xVTU4xNj48Q09MVU1OMTc+MTAwMTc8L0NPTFVNTjE3PjxDT0xVTU4xOD4xMDAxODwvQ09MVU1OMTg+PENPTFVNTjE+MTAwMDE8L0NPTFVNTjE+PENPTFVNTjE5PjEwMDE5PC9DT0xVTU4xOT48Q09MVU1OMj4xMDAwMjwvQ09MVU1OMj48Q09MVU1OMjA+MTAwMjA8L0NPTFVNTjIwPjxDT0xVTU4zPjEwMDAzPC9DT0xVTU4zPjxDT0xVTU4yMT4xMDAyMTwvQ09MVU1OMjE+PENPTFVNTjIyPjEwMDIyPC9DT0xVTU4yMj48Q09MVU1OMjM+MTAwMjM8L0NPTFVNTjIzPjxDT0xVTU4yND4xMDAyNDwvQ09MVU1OMjQ+PENPTFVNTjI1PjEwMDI1PC9DT0xVTU4yNT48Q09MVU1OMjY+MTAwMjY8L0NPTFVNTjI2PjxDT0xVTU4yNz4xMDAyNzwvQ09MVU1OMjc+PENPTFVNTjI4PjEwMDI4PC9DT0xVTU4yOD48Q09MVU1OMjk+MTAwMjk8L0NPTFVNTjI5PjxDT0xVTU4zMD4xMDAzMDwvQ09MVU1OMzA+PENPTFVNTjMxPjEwMDMxPC9DT0xVTU4zMT48Q09MVU1OMzI+MTAwMzI8L0NPTFVNTjMyPjxDT0xVTU4zMz4xMDAzMzwvQ09MVU1OMzM+PENPTFVNTjM0PjEwMDM0PC9DT0xVTU4zND48Q09MVU1OMzU+MTAwMzU8L0NPTFVNTjM1PjxDT0xVTU4zNj4xMDAzNjwvQ09MVU1OMzY+PENPTFVNTjM3PjEwMDM3PC9DT0xVTU4zNz48Q09MVU1OMzg+MTAwMzg8L0NPTFVNTjM4PjxDT0xVTU4zOT4xMDAzOTwvQ09MVU1OMzk+PENPTFVNTjQwPjEwMDQwPC9DT0xVTU40MD48Q09MVU1ONDE+MTAwNDE8L0NPTFVNTjQxPjxDT0xVTU40Mj4xMDA0MjwvQ09MVU1ONDI+PENPTFVNTjQzPjEwMDQzPC9DT0xVTU40Mz48Q09MVU1ONDQ+MTAwNDQ8L0NPTFVNTjQ0PjxDT0xVTU40NT4xMDA0NTwvQ09MVU1ONDU+PENPTFVNTjQ2PjEwMDQ2PC9DT0xVTU40Nj48Q09MVU1ONDc+MTAwNDc8L0NPTFVNTjQ3PjxDT0xVTU40OD4xMDA0ODwvQ09MVU1ONDg+PENPTFVNTjQ5PjEwMDQ5PC9DT0xVTU40OT48Q09MVU1ONTA+MTAwNTA8L0NPTFVNTjUwPgo8L0dfMT4KPEdfMT4KPENPTFVNTjQ+MjAwMDQ8L0NPTFVNTjQ+PENPTFVNTjU+MjAwMDU8L0NPTFVNTjU+PENPTFVNTjY+MjAwMDY8L0NPTFVNTjY+PENPTFVNTjc+MjAwMDc8L0NPTFVNTjc+PENPTFVNTjg+MjAwMDg8L0NPTFVNTjg+PENPTFVNTjk+MjAwMDk8L0NPTFVNTjk+PENPTFVNTjEwPjIwMDEwPC9DT0xVTU4xMD48Q09MVU1OMTE+MjAwMTE8L0NPTFVNTjExPjxDT0xVTU4xMj4yMDAxMjwvQ09MVU1OMTI+PENPTFVNTjEzPjIwMDEzPC9DT0xVTU4xMz48Q09MVU1OMTQ+MjAwMTQ8L0NPTFVNTjE0PjxDT0xVTU4xNT4yMDAxNTwvQ09MVU1OMTU+PENPTFVNTjE2PjIwMDE2PC9DT0xVTU4xNj48Q09MVU1OMTc+MjAwMTc8L0NPTFVNTjE3PjxDT0xVTU4xOD4yMDAxODwvQ09MVU1OMTg+PENPTFVNTjE+MjAwMDE8L0NPTFVNTjE+PENPTFVNTjE5PjIwMDE5PC9DT0xVTU4xOT48Q09MVU1OMj4yMDAwMjwvQ09MVU1OMj48Q09MVU1OMjA+MjAwMjA8L0NPTFVNTjIwPjxDT0xVTU4zPjIwMDAzPC9DT0xVTU4zPjxDT0xVTU4yMT4yMDAyMTwvQ09MVU1OMjE+PENPTFVNTjIyPjIwMDIyPC9DT0xVTU4yMj48Q09MVU1OMjM+MjAwMjM8L0NPTFVNTjIzPjxDT0xVTU4yND4yMDAyNDwvQ09MVU1OMjQ+PENPTFVNTjI1PjIwMDI1PC9DT0xVTU4yNT48Q09MVU1OMjY+MjAwMjY8L0NPTFVNTjI2PjxDT0xVTU4yNz4yMDAyNzwvQ09MVU1OMjc+PENPTFVNTjI4PjIwMDI4PC9DT0xVTU4yOD48Q09MVU1OMjk+MjAwMjk8L0NPTFVNTjI5PjxDT0xVTU4zMD4yMDAzMDwvQ09MVU1OMzA+PENPTFVNTjMxPjIwMDMxPC9DT0xVTU4zMT48Q09MVU1OMzI+MjAwMzI8L0NPTFVNTjMyPjxDT0xVTU4zMz4yMDAzMzwvQ09MVU1OMzM+PENPTFVNTjM0PjIwMDM0PC9DT0xVTU4zND48Q09MVU1OMzU+MjAwMzU8L0NPTFVNTjM1PjxDT0xVTU4zNj4yMDAzNjwvQ09MVU1OMzY+PENPTFVNTjM3PjIwMDM3PC9DT0xVTU4zNz48Q09MVU1OMzg+MjAwMzg8L0NPTFVNTjM4PjxDT0xVTU4zOT4yMDAzOTwvQ09MVU1OMzk+PENPTFVNTjQwPjIwMDQwPC9DT0xVTU40MD48Q09MVU1ONDE+MjAwNDE8L0NPTFVNTjQxPjxDT0xVTU40Mj4yMDA0MjwvQ09MVU1ONDI+PENPTFVNTjQzPjIwMDQzPC9DT0xVTU40Mz48Q09MVU1ONDQ+MjAwNDQ8L0NPTFVNTjQ0PjxDT0xVTU40NT4yMDA0NTwvQ09MVU1ONDU+PENPTFVNTjQ2PjIwMDQ2PC9DT0xVTU40Nj48Q09MVU1ONDc+MjAwNDc8L0NPTFVNTjQ3PjxDT0xVTU40OD4yMDA0ODwvQ09MVU1ONDg+PENPTFVNTjQ5PjIwMDQ5PC9DT0xVTU40OT48Q09MVU1ONTA+MjAwNTA8L0NPTFVNTjUwPgo8L0dfMT4KPC9EQVRBX0RTPg==</reportBytes>
<reportContentType>text/xml</reportContentType>
<reportFileID xsi:nil="true"/>
<reportLocale xsi:nil="true"/>
</runDataModelReturn>
</runDataModelResponse>
</soapenv:Body>
</soapenv:Envelope>
The important part in that return data is the REPORTBYTES attributes. That will return the entire report or data model payload, encoded in a base 64 format. You can take any decode functionality and resolve that data to plain unencoded data.
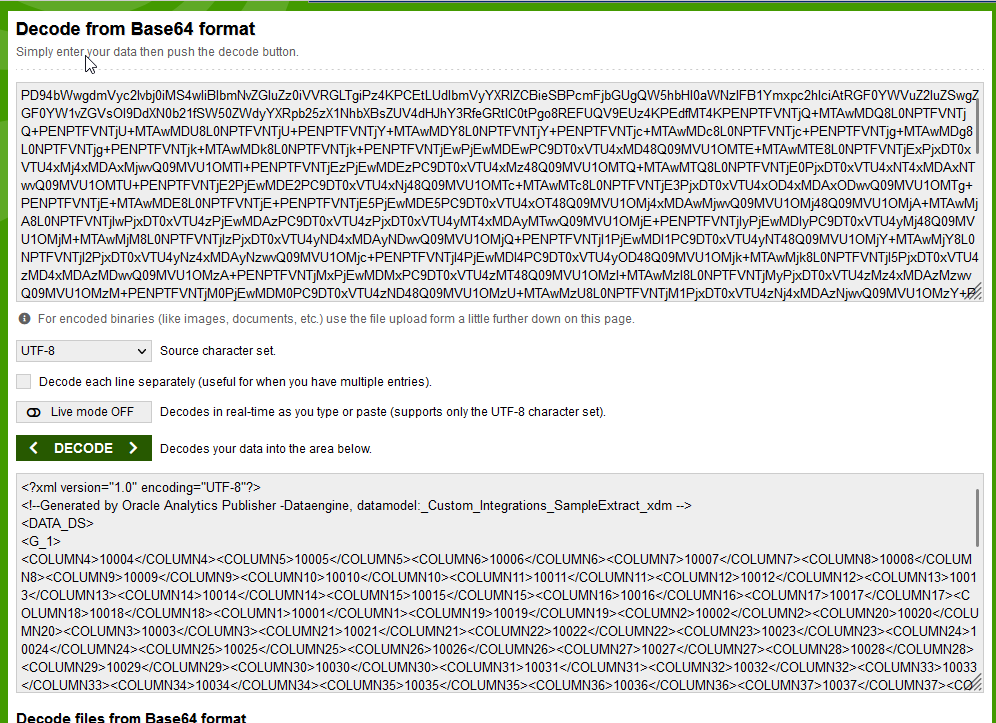
<?xml version="1.0" encoding="UTF-8"?>
<!--Generated by Oracle Analytics Publisher -Dataengine, datamodel:_Custom_Integrations_SampleExtract_xdm -->
<DATA_DS>
<G_1>
<COLUMN4>10004</COLUMN4><COLUMN5>10005</COLUMN5><COLUMN6>10006</COLUMN6><COLUMN7>10007</COLUMN7><COLUMN8>10008</COLUMN8><COLUMN9>10009</COLUMN9><COLUMN10>10010</COLUMN10><COLUMN11>10011</COLUMN11><COLUMN12>10012</COLUMN12><COLUMN13>10013</COLUMN13><COLUMN14>10014</COLUMN14><COLUMN15>10015</COLUMN15><COLUMN16>10016</COLUMN16><COLUMN17>10017</COLUMN17><COLUMN18>10018</COLUMN18><COLUMN1>10001</COLUMN1><COLUMN19>10019</COLUMN19><COLUMN2>10002</COLUMN2><COLUMN20>10020</COLUMN20><COLUMN3>10003</COLUMN3><COLUMN21>10021</COLUMN21><COLUMN22>10022</COLUMN22><COLUMN23>10023</COLUMN23><COLUMN24>10024</COLUMN24><COLUMN25>10025</COLUMN25><COLUMN26>10026</COLUMN26><COLUMN27>10027</COLUMN27><COLUMN28>10028</COLUMN28><COLUMN29>10029</COLUMN29><COLUMN30>10030</COLUMN30><COLUMN31>10031</COLUMN31><COLUMN32>10032</COLUMN32><COLUMN33>10033</COLUMN33><COLUMN34>10034</COLUMN34><COLUMN35>10035</COLUMN35><COLUMN36>10036</COLUMN36><COLUMN37>10037</COLUMN37><COLUMN38>10038</COLUMN38><COLUMN39>10039</COLUMN39><COLUMN40>10040</COLUMN40><COLUMN41>10041</COLUMN41><COLUMN42>10042</COLUMN42><COLUMN43>10043</COLUMN43><COLUMN44>10044</COLUMN44><COLUMN45>10045</COLUMN45><COLUMN46>10046</COLUMN46><COLUMN47>10047</COLUMN47><COLUMN48>10048</COLUMN48><COLUMN49>10049</COLUMN49><COLUMN50>10050</COLUMN50>
</G_1>
<G_1>
<COLUMN4>20004</COLUMN4><COLUMN5>20005</COLUMN5><COLUMN6>20006</COLUMN6><COLUMN7>20007</COLUMN7><COLUMN8>20008</COLUMN8><COLUMN9>20009</COLUMN9><COLUMN10>20010</COLUMN10><COLUMN11>20011</COLUMN11><COLUMN12>20012</COLUMN12><COLUMN13>20013</COLUMN13><COLUMN14>20014</COLUMN14><COLUMN15>20015</COLUMN15><COLUMN16>20016</COLUMN16><COLUMN17>20017</COLUMN17><COLUMN18>20018</COLUMN18><COLUMN1>20001</COLUMN1><COLUMN19>20019</COLUMN19><COLUMN2>20002</COLUMN2><COLUMN20>20020</COLUMN20><COLUMN3>20003</COLUMN3><COLUMN21>20021</COLUMN21><COLUMN22>20022</COLUMN22><COLUMN23>20023</COLUMN23><COLUMN24>20024</COLUMN24><COLUMN25>20025</COLUMN25><COLUMN26>20026</COLUMN26><COLUMN27>20027</COLUMN27><COLUMN28>20028</COLUMN28><COLUMN29>20029</COLUMN29><COLUMN30>20030</COLUMN30><COLUMN31>20031</COLUMN31><COLUMN32>20032</COLUMN32><COLUMN33>20033</COLUMN33><COLUMN34>20034</COLUMN34><COLUMN35>20035</COLUMN35><COLUMN36>20036</COLUMN36><COLUMN37>20037</COLUMN37><COLUMN38>20038</COLUMN38><COLUMN39>20039</COLUMN39><COLUMN40>20040</COLUMN40><COLUMN41>20041</COLUMN41><COLUMN42>20042</COLUMN42><COLUMN43>20043</COLUMN43><COLUMN44>20044</COLUMN44><COLUMN45>20045</COLUMN45><COLUMN46>20046</COLUMN46><COLUMN47>20047</COLUMN47><COLUMN48>20048</COLUMN48><COLUMN49>20049</COLUMN49><COLUMN50>20050</COLUMN50>
</G_1>
</DATA_DS>
Now you should be able to take that XML, parse it and use the data that is returned by the BIP report or data model. With that information in mind, let's look at the OIC pattern we would use.
BI Publisher Report
One of the obvious prerequisites for this report is having a BI Publisher data model or report to call through the web services detailed above. In this case, I have created a BIP Data Model located at /Custom/Integrations/SampleExtract.xdm. This report queries DUAL for some dummy data.
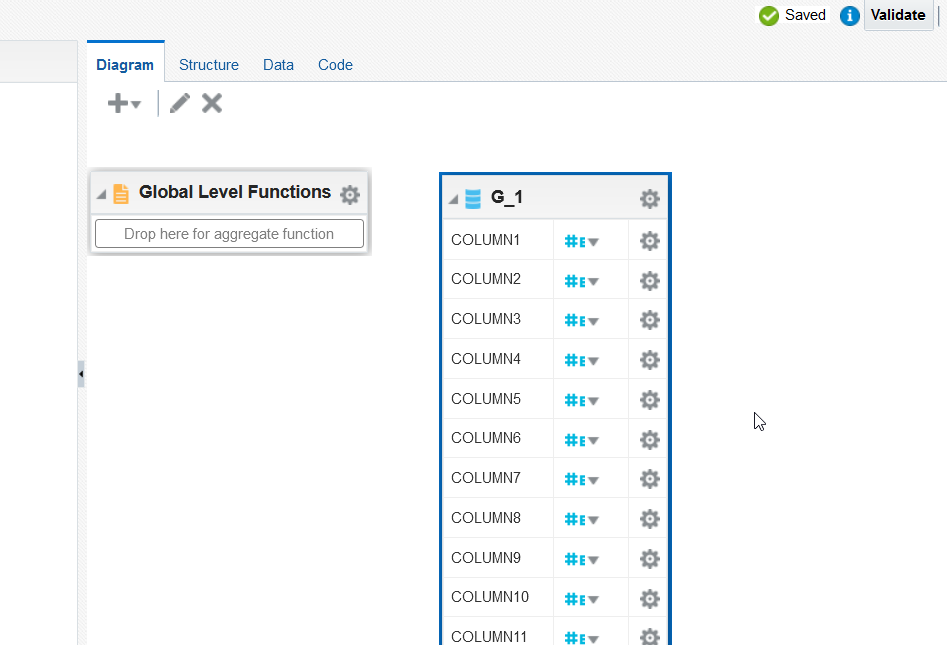
While it might be less easy to read the results of the report, if you alias all of your BIP Data Model columns the same way (column1, column2,... column 50), then you can reuse this integration for any data model that you created.
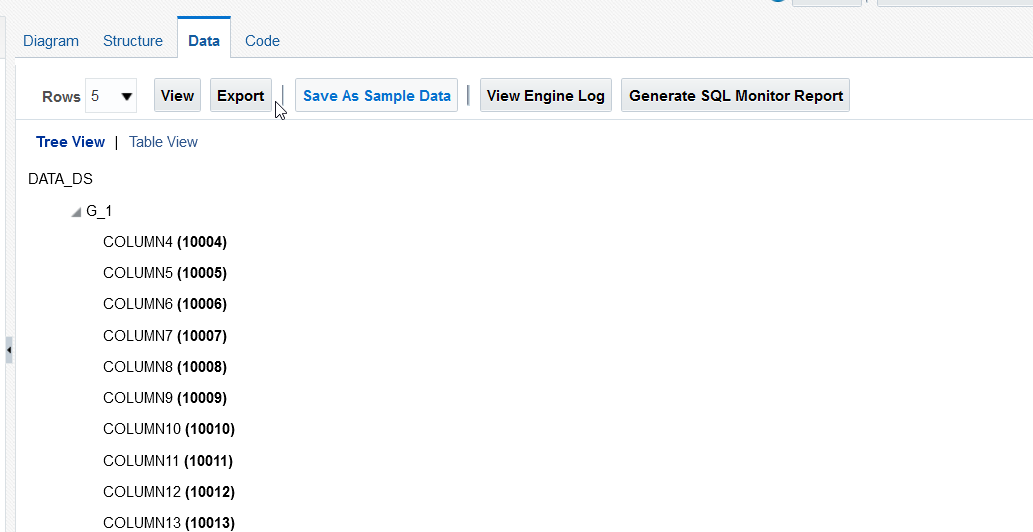
In this step, make sure ot view some data, and export it. We will need the sample XM Later on:

Connections
For this pattern, we will need two connections. One is a generic REST trigger adaptor that we will use to expose the orchestration endpoint. The second is an invoke that we will use to call the BIP web service described above.
REST INVOKE
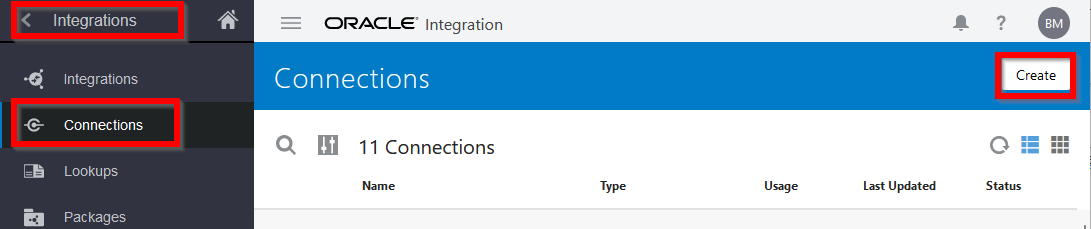
Note that for the REST trigger connection, there is no need to create an additional one if you already have any REST trigger. You can reuse that if it is already created. If you don't have one, to create any connection, from the main OIC Landing page, select Integrations, connections, then click on Create
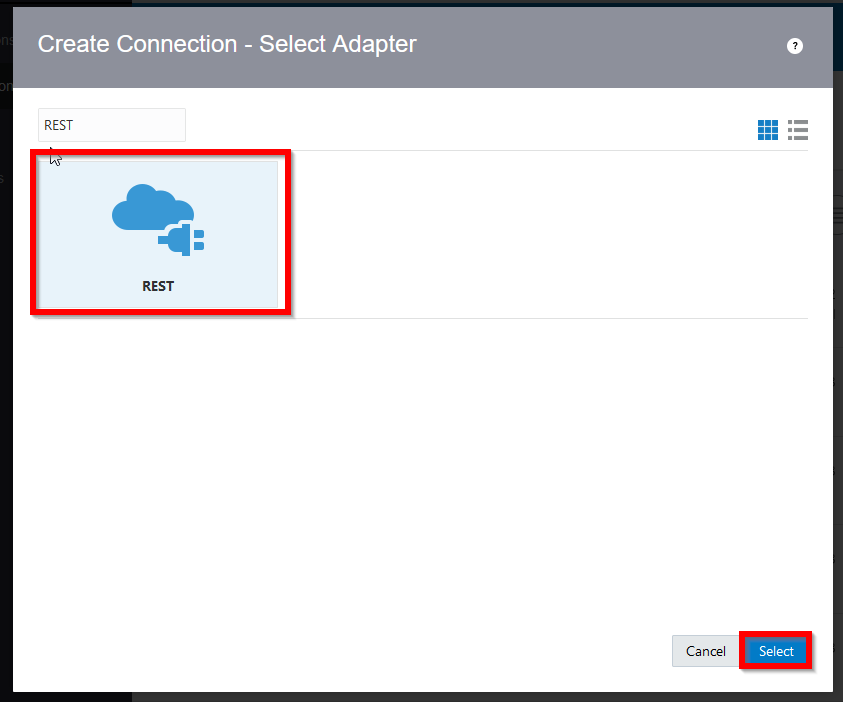
Select a REST Adaptor and click select
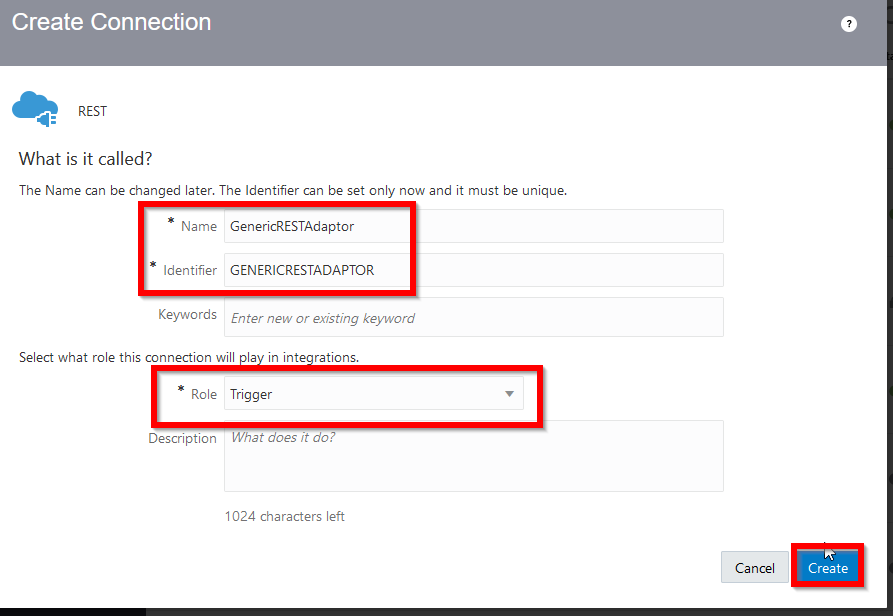
Enter the required fields like Name and identifier and select the role, then click on create. Here I am selecting Trigger, but Invoke and trigger would work fine too.
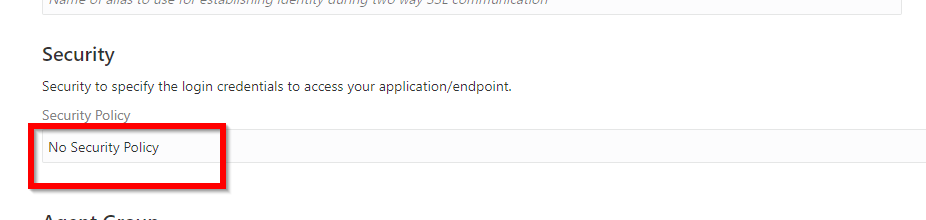
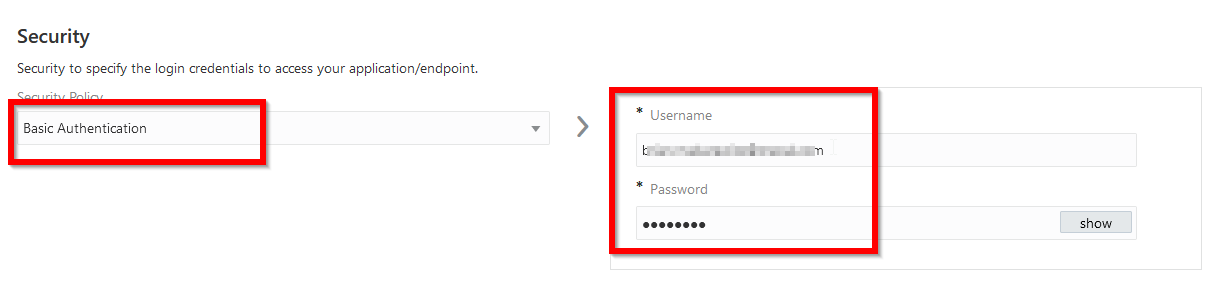
The only thing we need to specify is the security policy and the then save the connection. For this, ensure that the security policy is set to 'No Security Policy'. This is only for The report service, since the authorization is included in the message.
BIP TRIGGER
Again, from the main OIC Landing page, select Integrations, connections, then click on Create
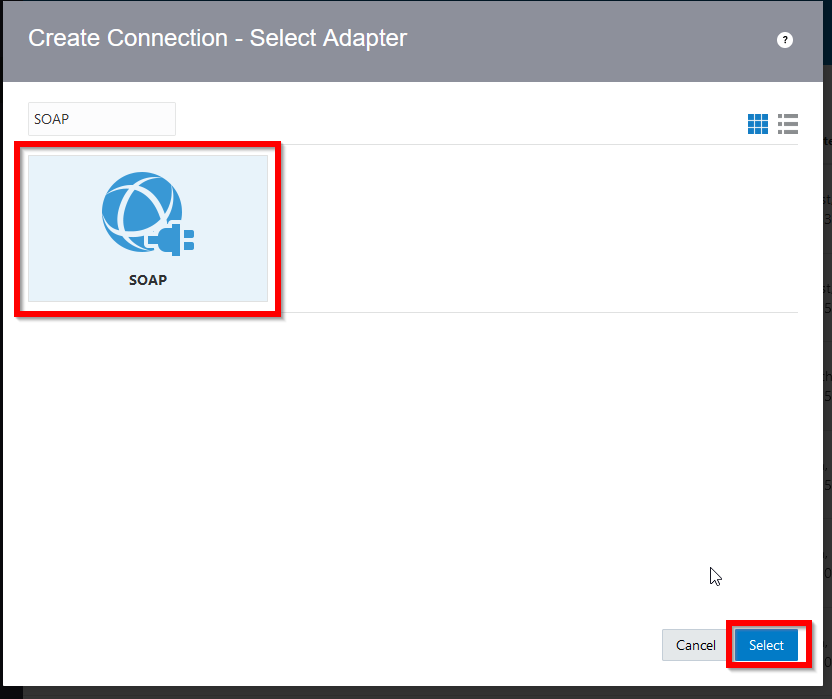
For invoke, we need to select a SOAP adaptor
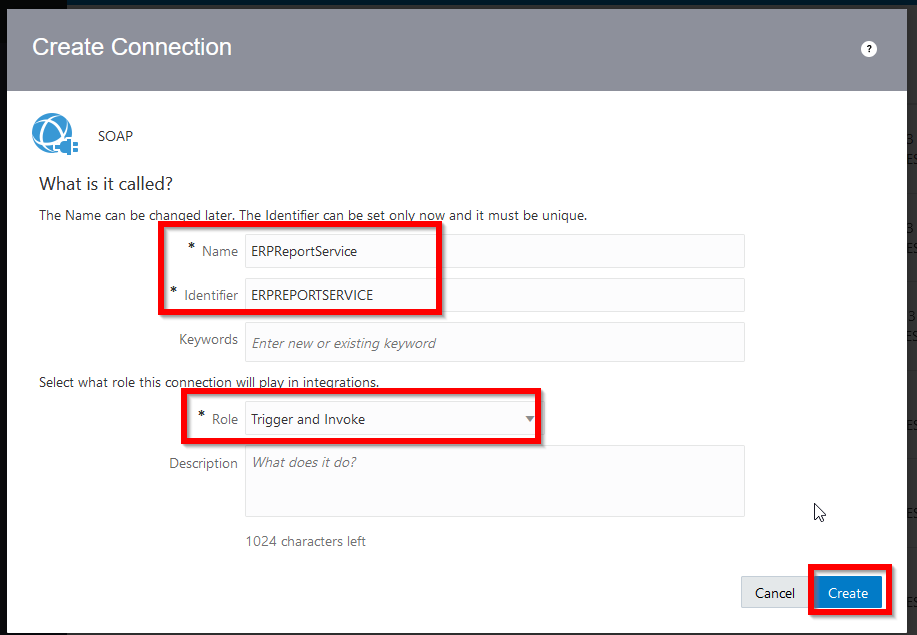
Again, fill in the required name and identifier and this time select invoke, or trigger and invoke. Since we are specifying the full URL in the connection details, I am going to give this connection a non generic name
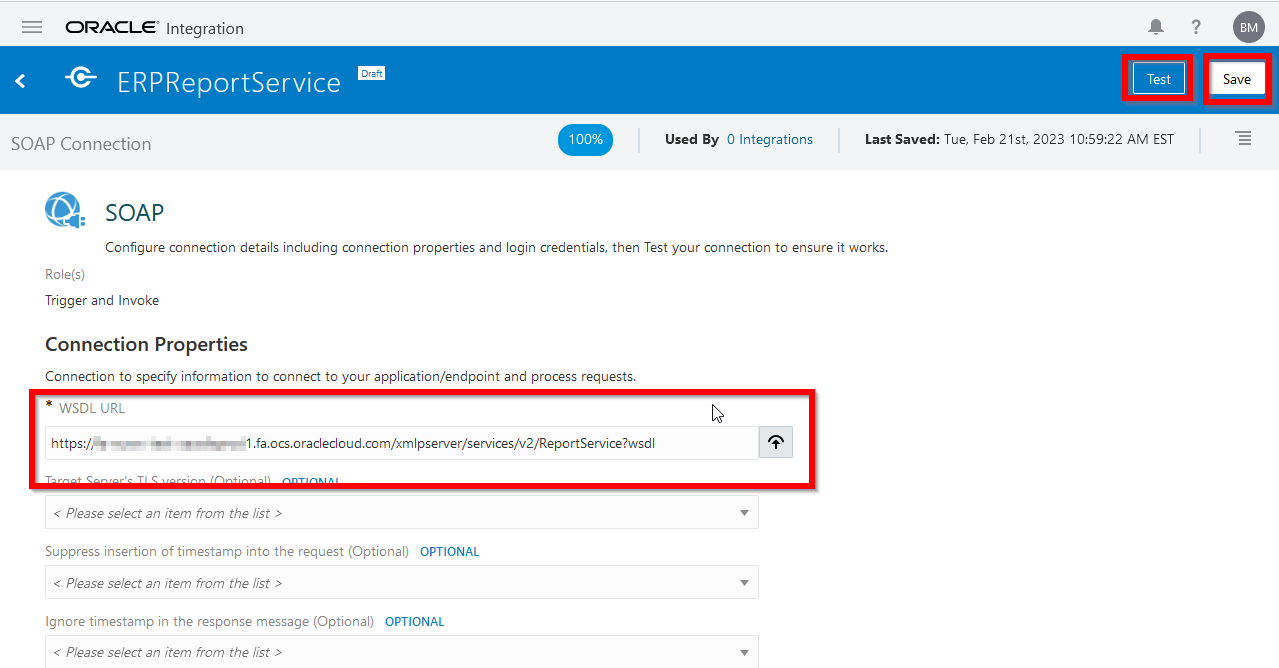
Enter the WSDL discussed above for the BIP report service for the instance you are connecting to. You will need to test this before saving it. And make sure that you enter your authentication information all the way at the bottom of the screen before testing or saving.
With those two connections created, we are ready to create our integration.
BIP Extract Integration Pattern
In this integration we are going to create a generic orchestration that takes in one parameter, the report location, along with the username and password. The orchestrion will return some generic columns in the form of JSON. Within the orchestration, we will call the BIP report, take in the data, decode it form base 64, parse out the XML and send it back to the user. As an aside, the username/password being included in the payload is a big security gap. There are ways around that, where you can use a session token, but for the purposes of this orchestration, we are going to ignore the security risk.
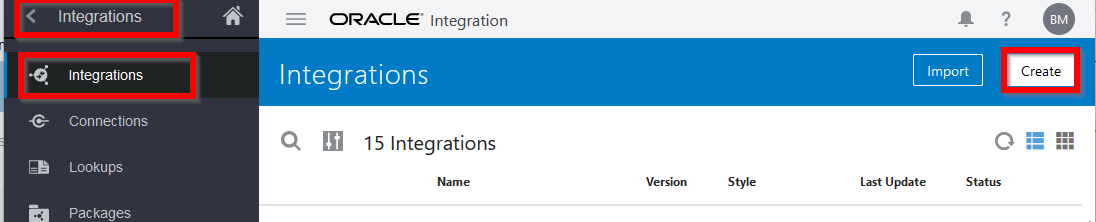
To start, log into your OIC environment, select Integrations > Integrations, and then click Create
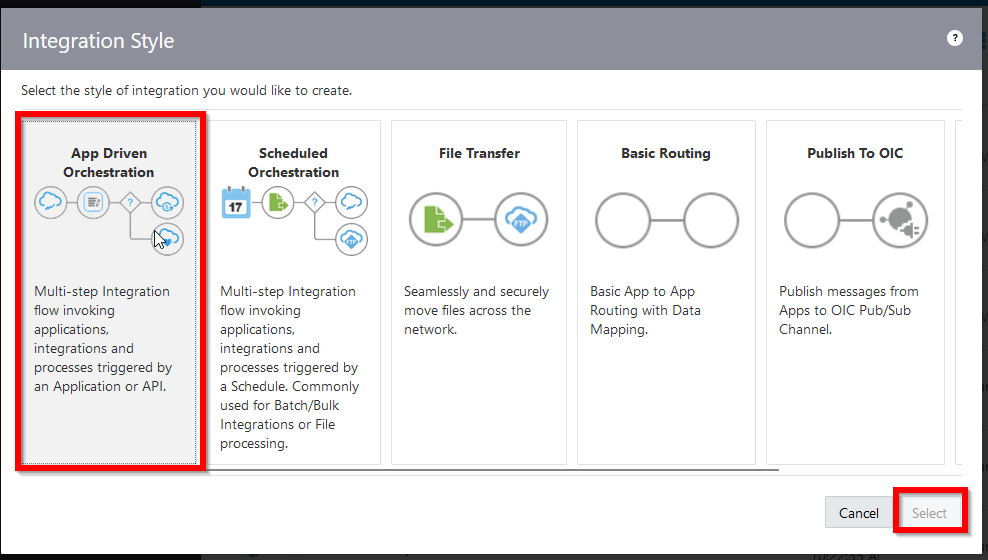
Select the App Driven Orchestration and click select
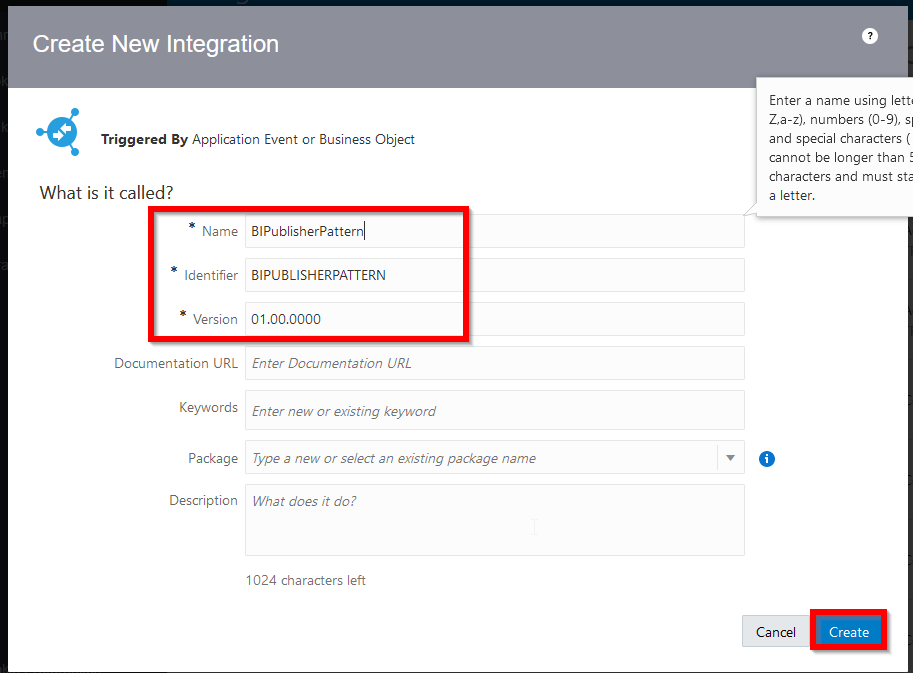
Enter the Name, Identifier, and Version along with any other fields that you want to fill in, and click create
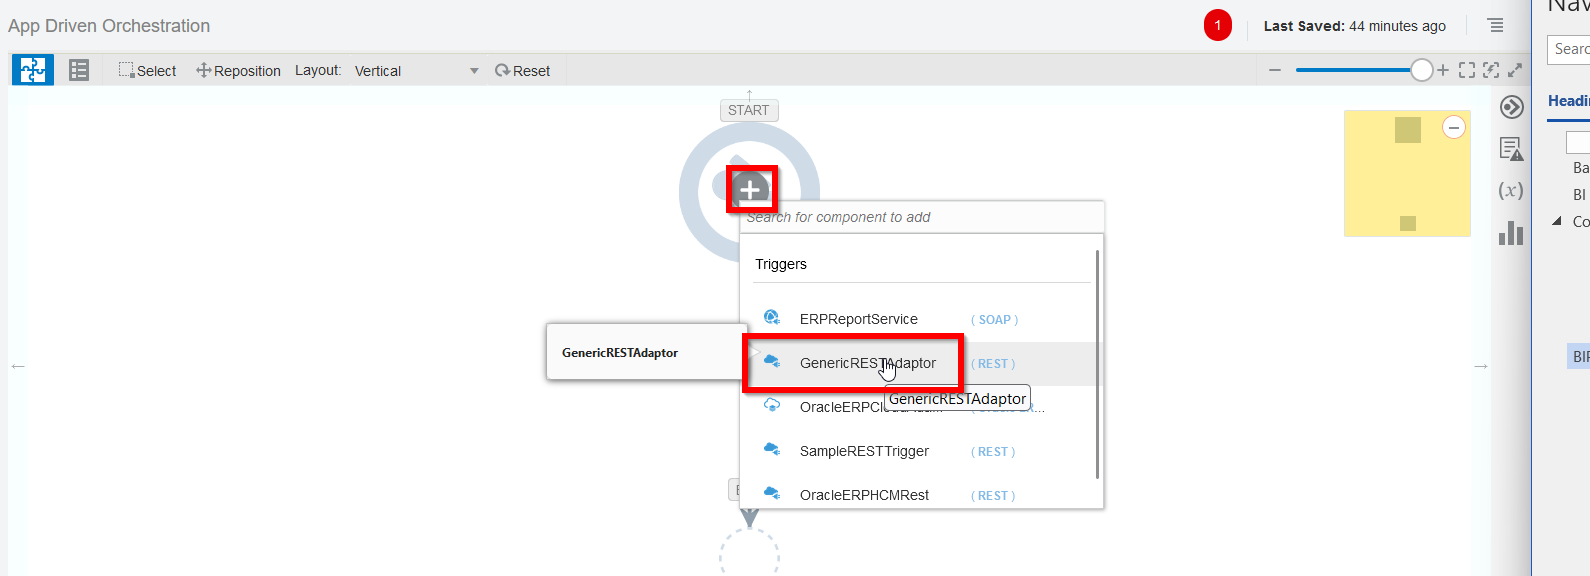
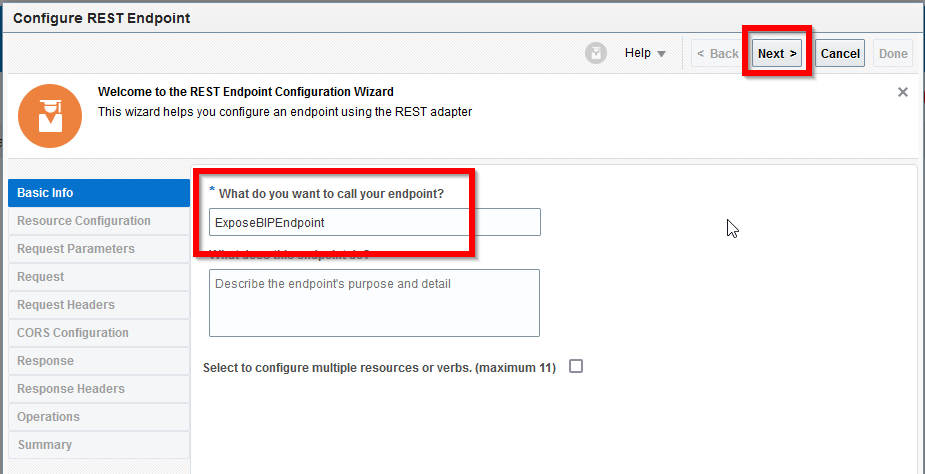
This will open the main designer Pallet. For the trigger, we want to select the Generic REST adaptor. The below screen shots detail the specifics around configuring this REST adaptor. The one thing I want to point out here is that for the response payload, we are going to create this orchestration to allow the user to call most BI Publisher reports. In our case, we have about 15 columns. But we are going to create an orchestration to allow for calling a BIP Data Model or report of up to 50 columns.
Basic Info
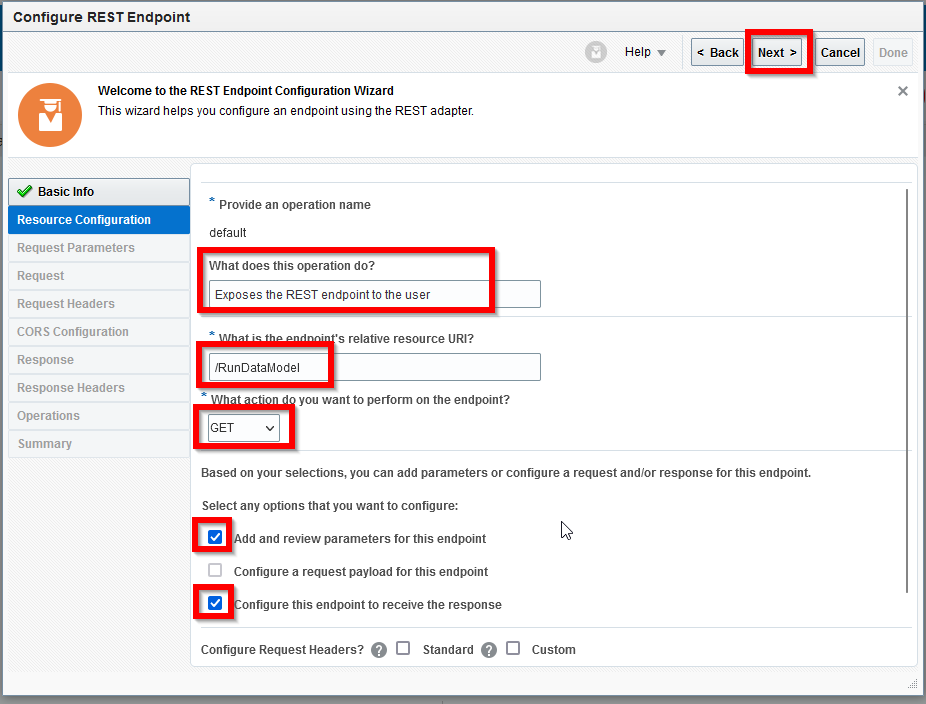
Resource Configuration
In this tab, Make suer that you select GET. This will limit us to using template or query parameters to pass in the BI Publisher report or data model info, since we cannot use a payload. Then make sure you select the checkboxes to add parameters and to configure this endpoint to receive a response
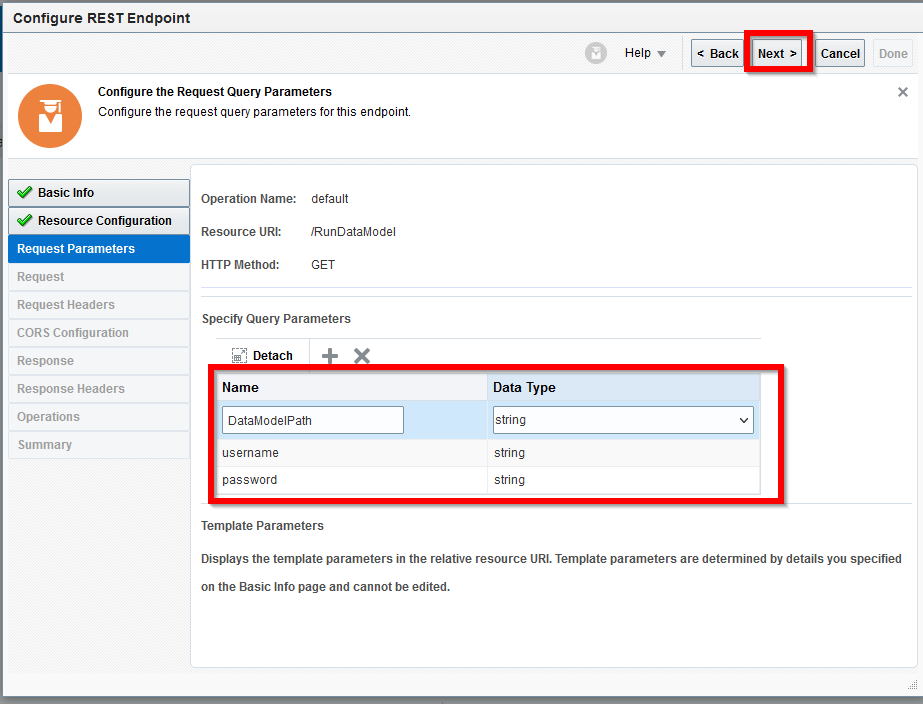
Request Parameters
IN the request parameters, we are going to select 3 different parameters, all of which are strings
Response
OIn the response tab, we want to enter some JSON. Select JSON Sample as the payload format, and select JSON as the media-type of the response body, and then click on inline. In that box, enter the JSON below and click OK
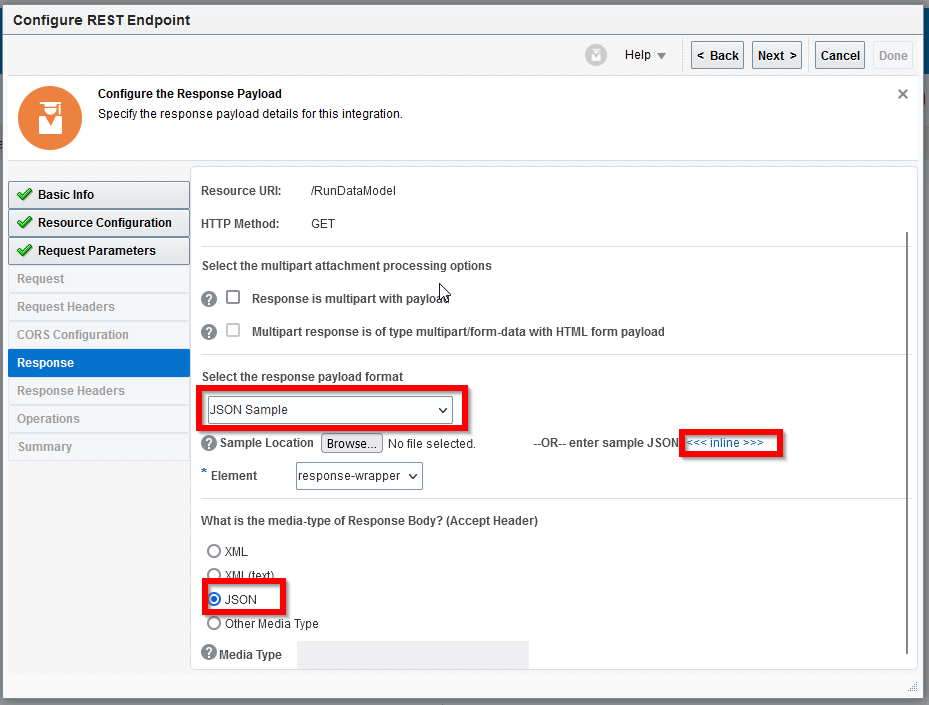
Keep in mind that the JSON below does not match the report output. In this case, we want to reuse this orchestration for any data model. So instead of matching the return JSON to the BIP report, I am going to make it generic, so we will map the first column in ANY BIP data model to Column1, the second column in ANY BIP data model to Column2, etc.
{
"Record":{
"Column01":"1",
"Column02":"1",
"Column03":"1",
"Column04":"1",
"Column05":"1",
"Column06":"1",
"Column07":"1",
"Column08":"1",
"Column09":"1",
"Column10":"1",
"Column11":"1",
"Column12":"1",
"Column13":"1",
"Column14":"1",
"Column15":"1",
"Column16":"1",
"Column17":"1",
"Column18":"1",
"Column19":"1",
"Column20":"1",
"Column21":"1",
"Column22":"1",
"Column23":"1",
"Column24":"1",
"Column25":"1",
"Column26":"1",
"Column27":"1",
"Column28":"1",
"Column29":"1",
"Column30":"1",
"Column31":"1",
"Column32":"1",
"Column33":"1",
"Column34":"1",
"Column35":"1",
"Column36":"1",
"Column37":"1",
"Column38":"1",
"Column39":"1",
"Column40":"1",
"Column41":"1",
"Column42":"1",
"Column43":"1",
"Column44":"1",
"Column45":"1",
"Column46":"1",
"Column47":"1",
"Column48":"1",
"Column49":"1",
"Column50":"1"},
"Record":{
"Column01":"1",
"Column02":"1",
"Column03":"1",
"Column04":"1",
"Column05":"1",
"Column06":"1",
"Column07":"1",
"Column08":"1",
"Column09":"1",
"Column10":"1",
"Column11":"1",
"Column12":"1",
"Column13":"1",
"Column14":"1",
"Column15":"1",
"Column16":"1",
"Column17":"1",
"Column18":"1",
"Column19":"1",
"Column20":"1",
"Column21":"1",
"Column22":"1",
"Column23":"1",
"Column24":"1",
"Column25":"1",
"Column26":"1",
"Column27":"1",
"Column28":"1",
"Column29":"1",
"Column30":"1",
"Column31":"1",
"Column32":"1",
"Column33":"1",
"Column34":"1",
"Column35":"1",
"Column36":"1",
"Column37":"1",
"Column38":"1",
"Column39":"1",
"Column40":"1",
"Column41":"1",
"Column42":"1",
"Column43":"1",
"Column44":"1",
"Column45":"1",
"Column46":"1",
"Column47":"1",
"Column48":"1",
"Column49":"1",
"Column50":"1"}
}
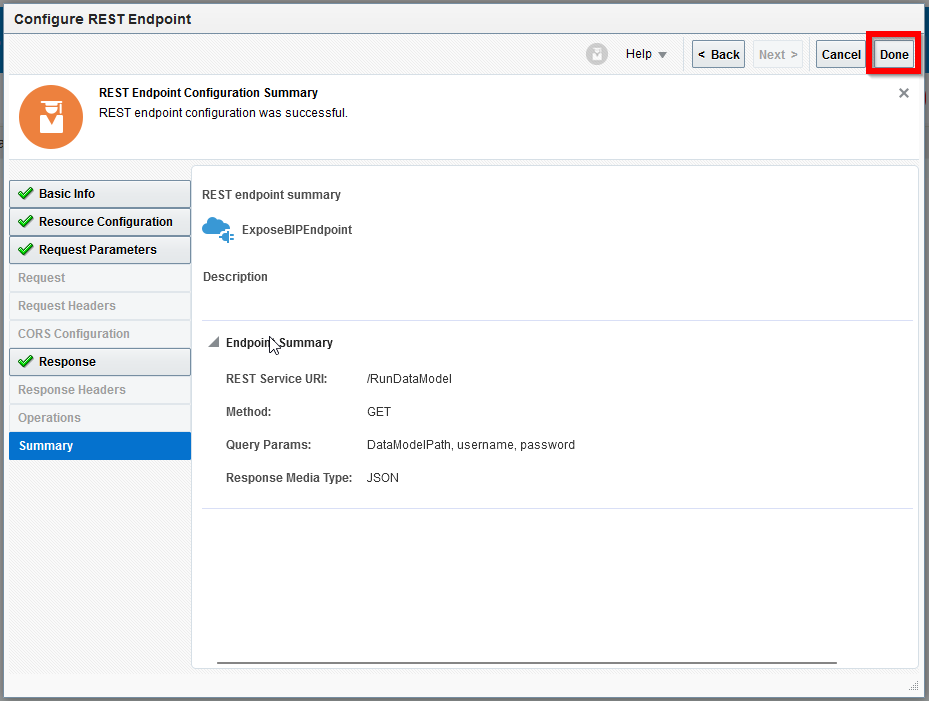
Summary
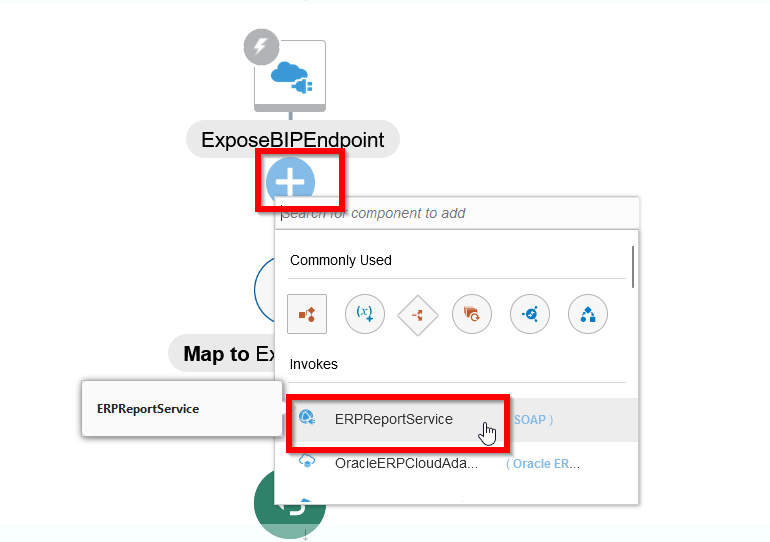
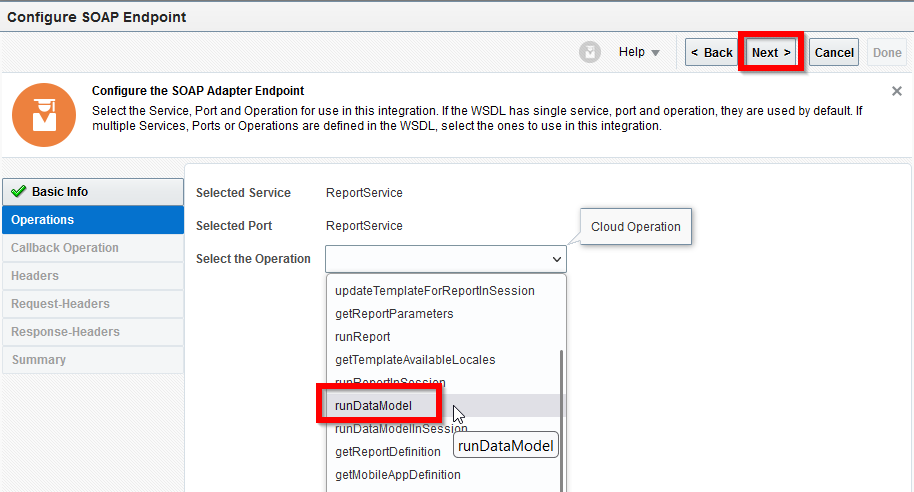
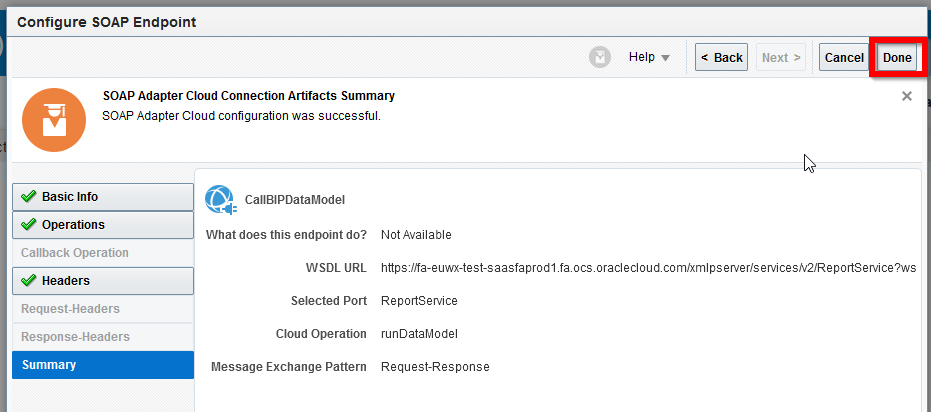
Next, we want to call our BIP report, so in the main orchestration developer pallet, select a new invoke, and use the ERPReport Service Endpoint that we created
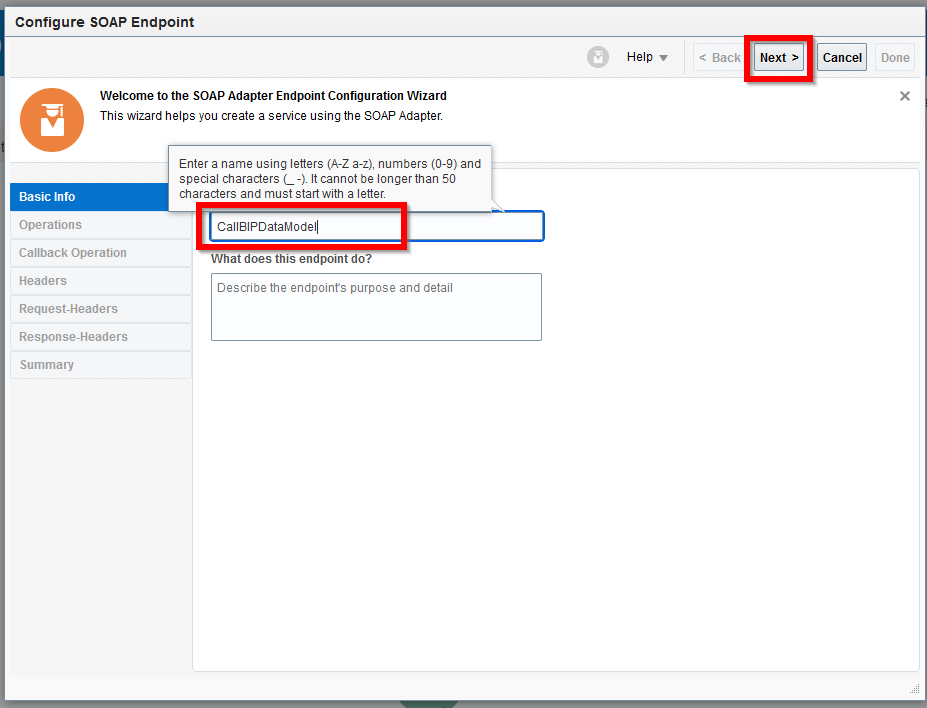
Basic Info
Operations
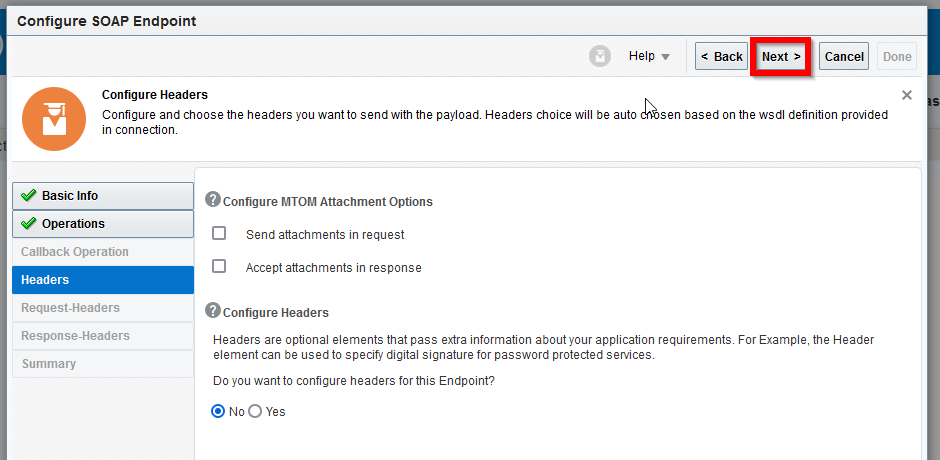
Headers
Summary
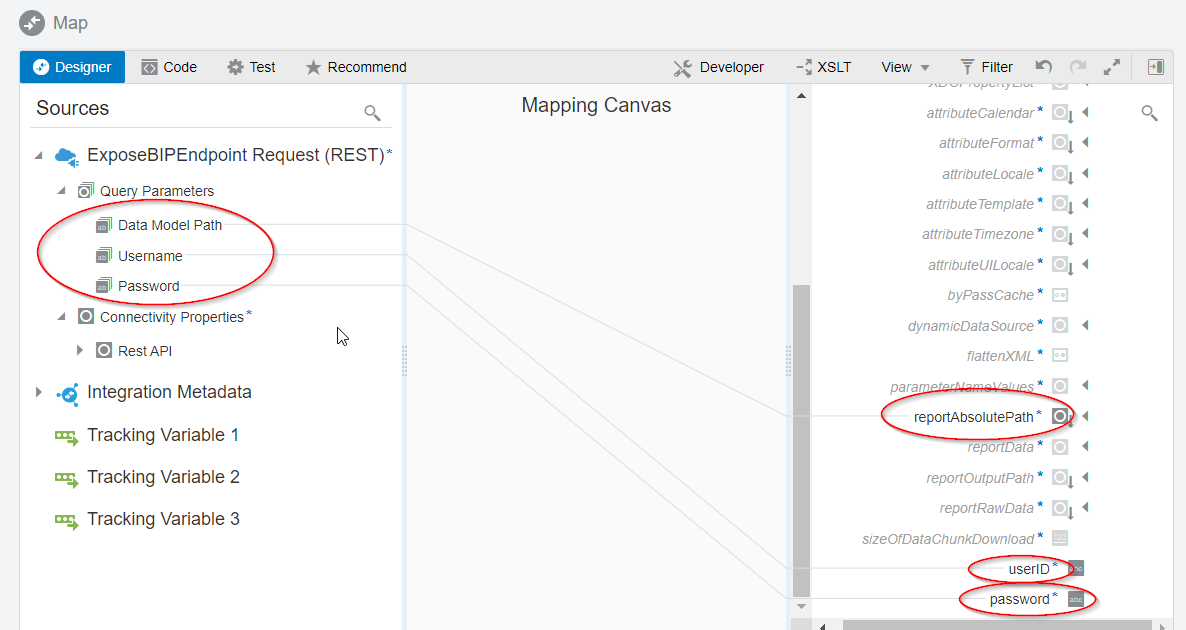
Next, we want to map to the CallBIPBataModel web service call. Here we are going to specify the report path, username, and password that we will be passing into the web service call. The data model has a ton of attributes that we can populate, and they are all useful for more complicated scenarios where you need to specify date formats, or choose a template, or download the report asynchronously. In this case, we just want to run a report wide open and get the results, so the 3 parameters below will suffice.
Next, we need to take the report bytes data that we get back from the RunDataModel web service and parse the XML. That involves three steps:
-
Assign the base64 data to a variable. This variable will use an OIC function to turn the base64 encoded data into a file reference.
-
Write that file reference
-
Read the file reference and in doing so, provide an XML Structure to expect
Assign the base64 data to a variable
After the SOAP invoke web service, add a new variable action
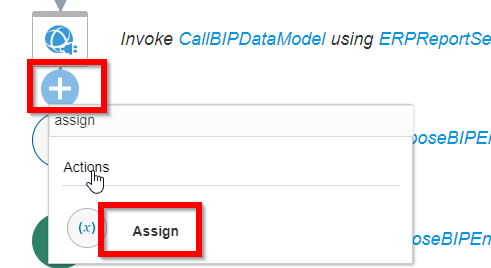
Give it a meaningful name
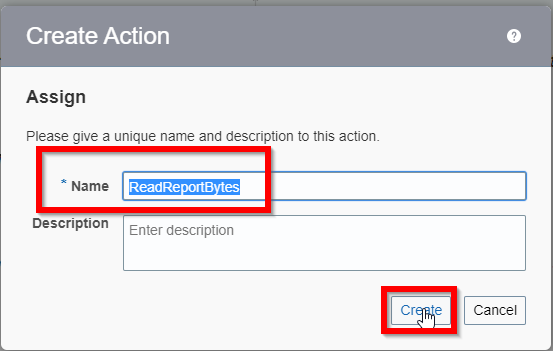
Click on the plus to add a new row, name the Variable, and then click on the edit icon

Within this assign action, we want to assign the XMLFileReference variable. To do this, we need the base64 data which is returned in the DataModel web service call as the report bytes attribute. We will use this as a parameter to an OIC function called decodebase643toReference. Drag those into the expression editor, ensure it looks like the image below, then validate and close.
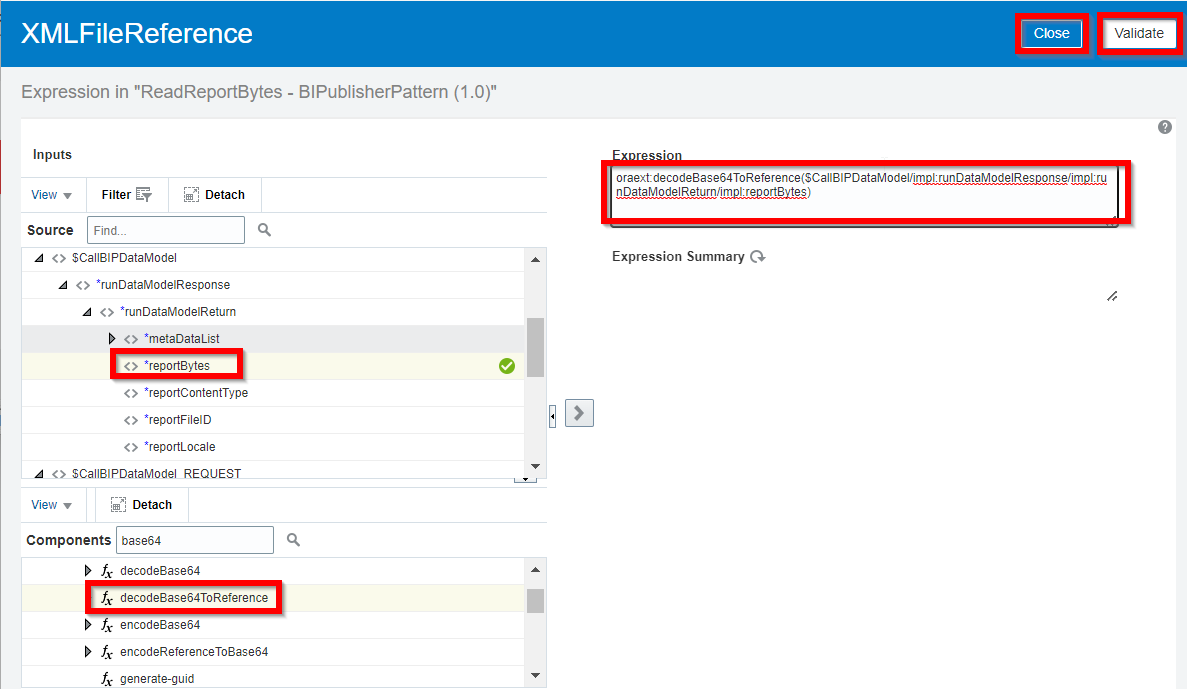
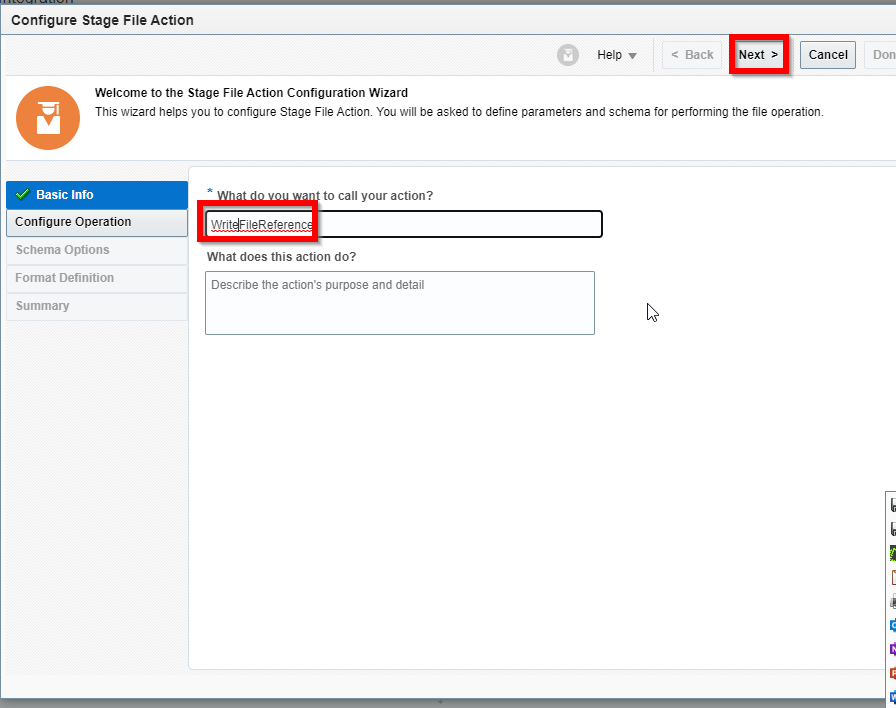
This gives us a pointer to an in memory file that we are going to read, and in reading it, we are going to tell OIC how it is structured. So after the assign action, click on a new action and select stage file
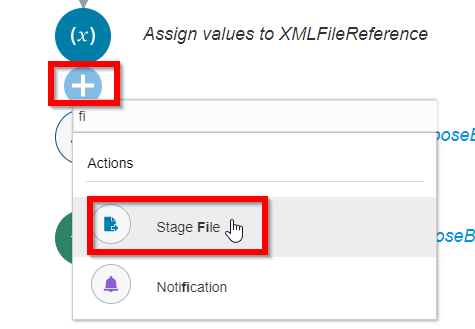
That will open up a dialogue where we can enter the following
Basic Data
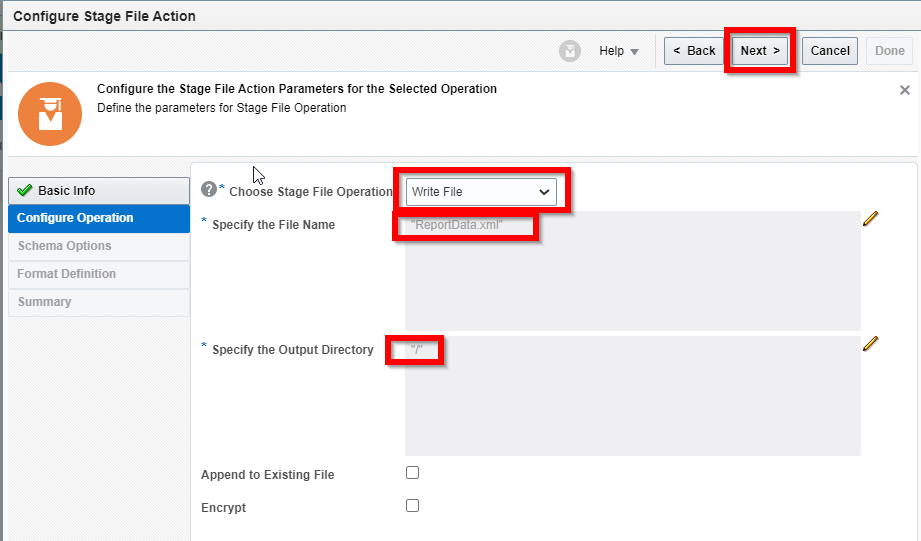
Configure Operation
In this step, all we need to do is specify a filename and location for where we want to write the file. We can make this more robust and parameterize the filename so it is not saved with the same name in the same location each time, but for now, we are just going to hardcode this data. Make a note of the filename and location, we will need that in the next step
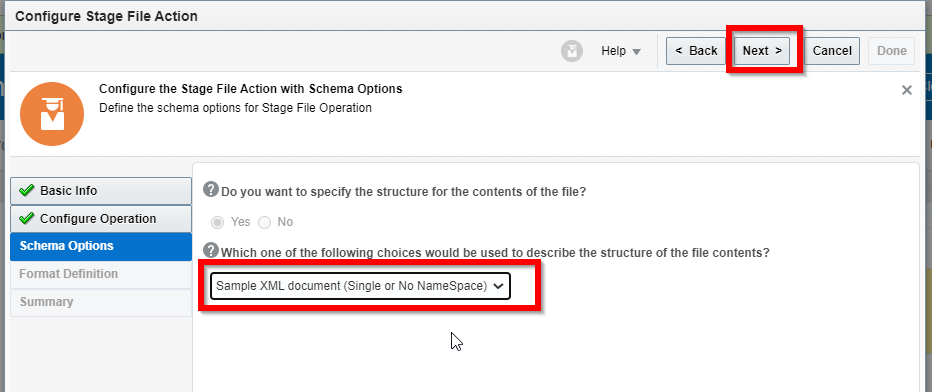
Schema Options
Here, sleect a sample XML file that we downloaded from the BIP Data Model and click next
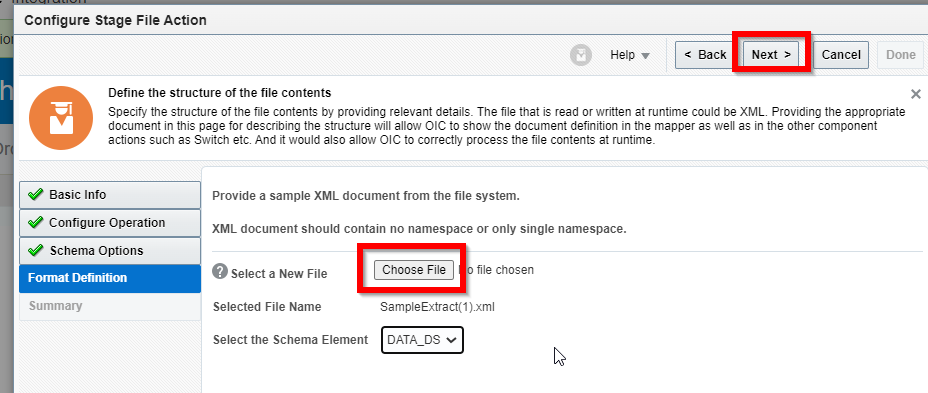
Format Definition
Select the sample xml file that we saved earlier and click next
Summary
Make sure all the data looks right and click done
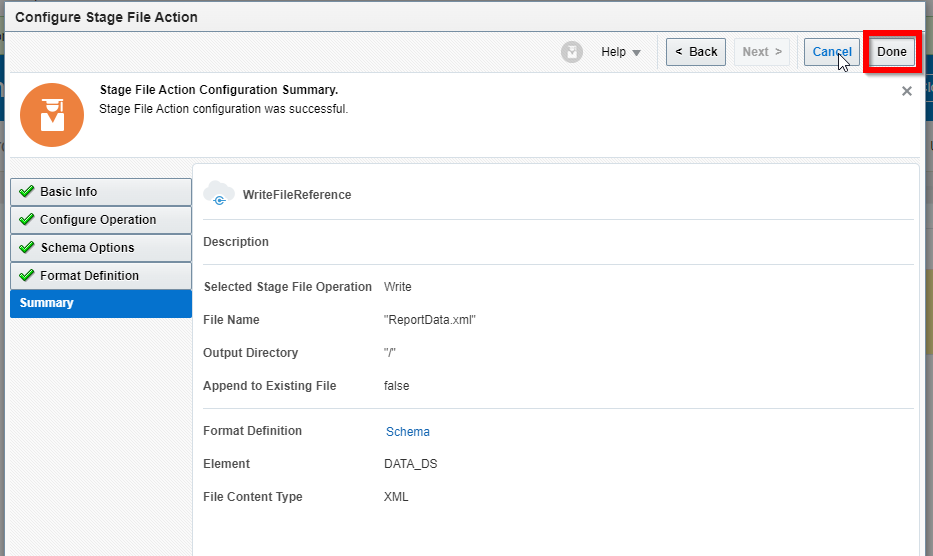
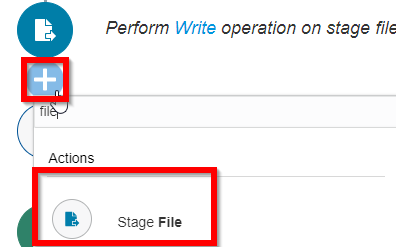
And the last step is now to read that file. So after the write operation, click to add a new action and select a stage file action
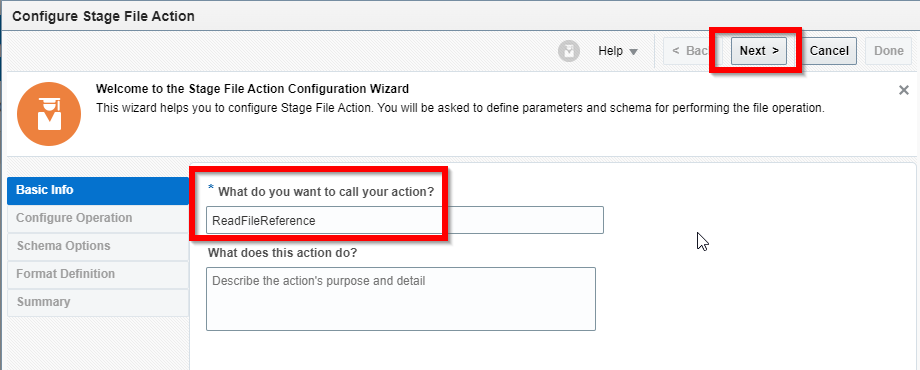
Basic Info
This time, we will be reading the file
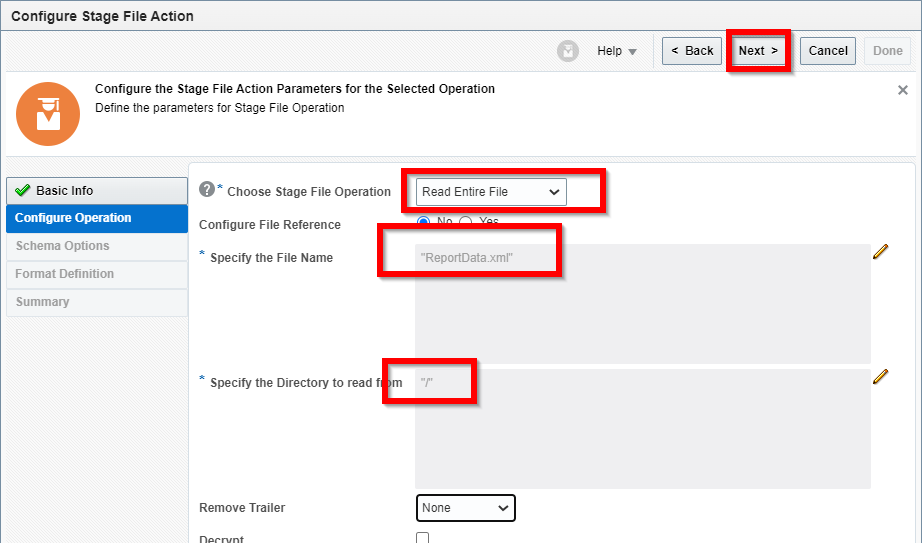
Configure Operation
Here we want to select the read entire file, and the filename and the location are the same values we entered in the write file operation.
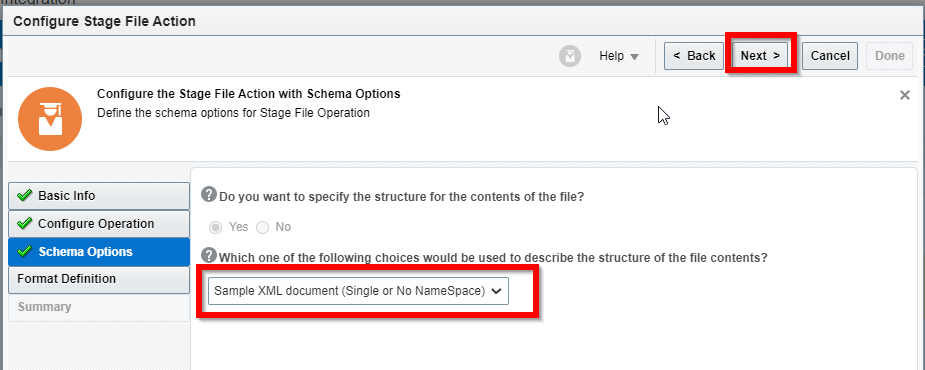
Schema Operations
Select a sample XML file and click next
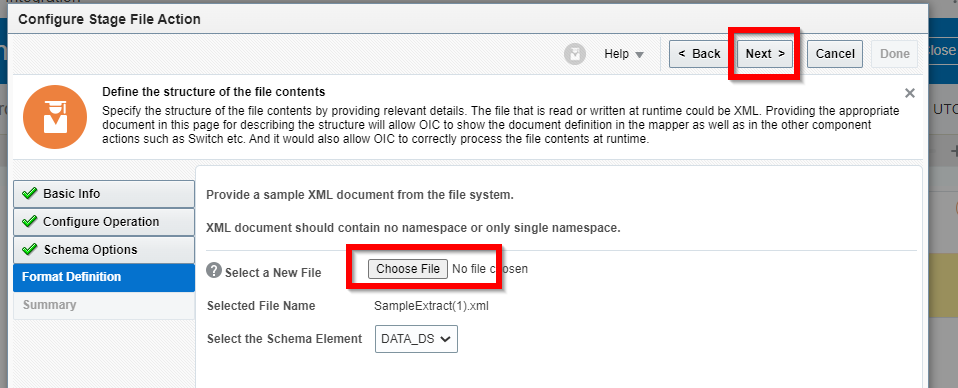
Format definition
Choose the XML samlple file we saved previously and click next
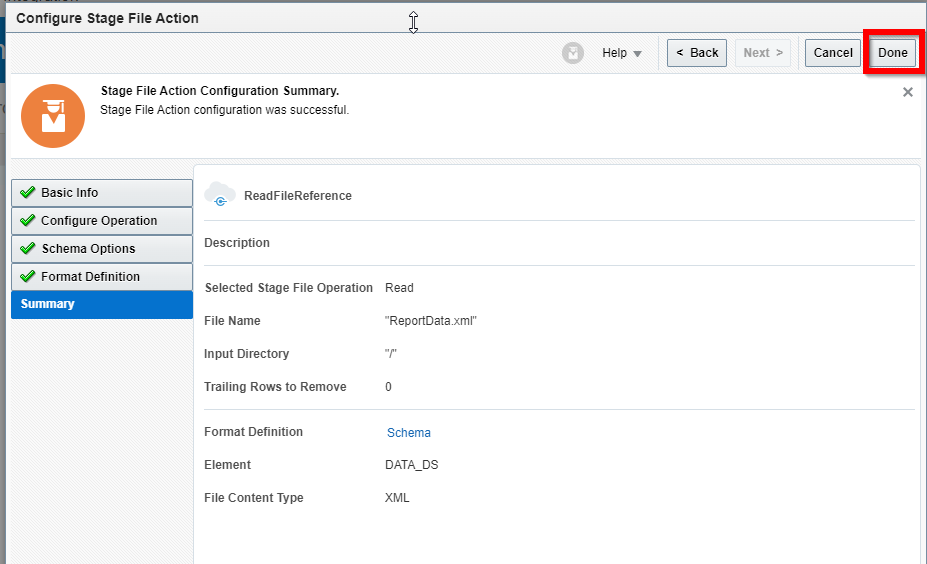
Summary
Review the data and click Done
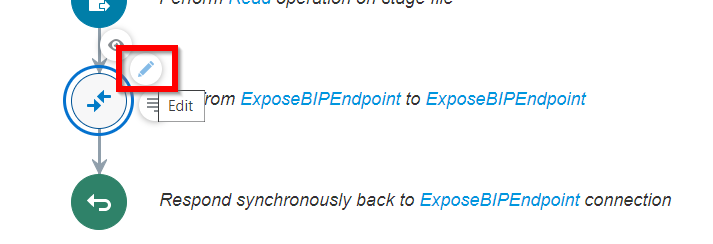
Our final step is to map the output of the file over to the response payload, so click on that mapping and edit it.