Exposing a REST Service with a Payload in OIC
Exposing a REST Service with a Payload in OIC
Exposing a REST service with a Payload
There are a few ways to pass information into a webservice in OIC. You can use a template parameter, a query parameter, an attachment, or a payload.
Attachment: Used when data needs to be passed in and stored somewhere. For example, if you need to send a csv or a PDF or an excel file to a webservice for the file to be places somewhere. Technically, you could also use this to take in a csv or dat file, parse the data attributes in the file and then do something with those attributes, but there are better OIC patterns that handle that use case, like placing the file on an FTP server. Personally, I have not attached a file into an HTTP call too many times, but you may run into this requirement if you are interacting with a service that is used to electronically sign documents
Payload: This is typically used when need to pass in multiple attributes related to one object, and you need to reply with a real time response. Most times, the main item in this call is not repeating, but any attributes within the main object may repeat. For example, if you needed to take in an invoice object, it might have multiple lines. While you could take in multiple invoice objects, there are better patterns to do this. The main issue here is the question of what you would do if one invoice failed. Again, it's possible, but there are better ways to do this. You can use JSON or SOAP to accomplish this type of pattern. One important point here, is that you would not pass information INTO a web service while invoking a GET command using a JSON or SOAP payload.
Template Parameter: This is typically exposed when you are trying to perform an action using a web service, and you can reference the object you want to perform the action on with one identifier. An example would be getting information about a particular invoice number or submitting a particular requisition number for approval. This can be used in conjunction with sending in or receiving a payload as a response from the web service.
Query parameter: This is typically used in get operations where the user invoking the web service can add additional information to the web service call to narrow down the results that are returned. SO for example, you can expose a query parameter for the vendor and date if you want to allow someone to run a webservice and filter the invoices returned to a specific vendor or invoices due by a specific date.
In this post, we will show how to expose a web service that allows the user invoking the service to pass in a predefined payload.
First, you'll need to create a simple rest connection with basic authentication. You can review that process here, but remember that since we are exposing this as a rest trigger, the rest connection does not include any path information, and since the payload, template and query params are all defined when the REST connection is used in the integration, the only thing defined on the connection is the security information.
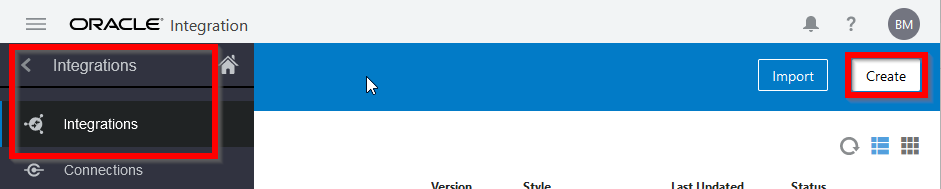
Next, go ahead and create a new orchestration by navigating to Integrations > Integrations and then clicking create.
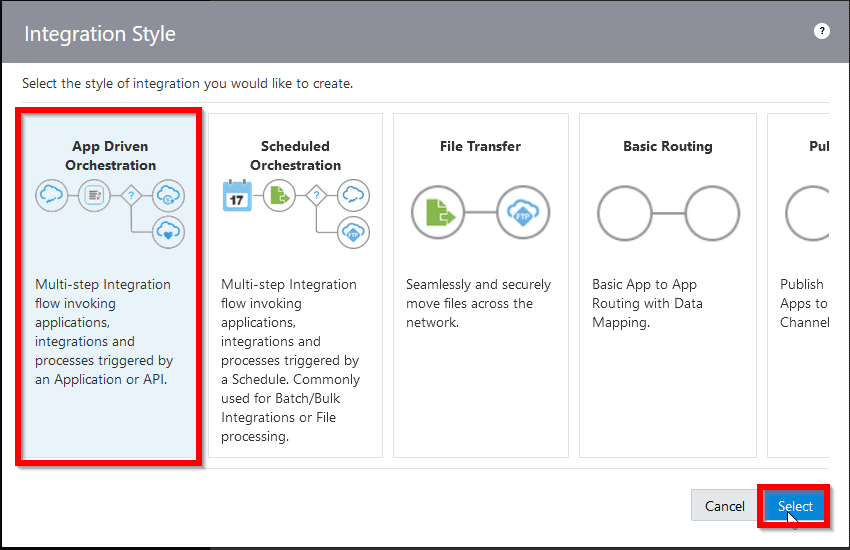
Then select an app driven orchestration
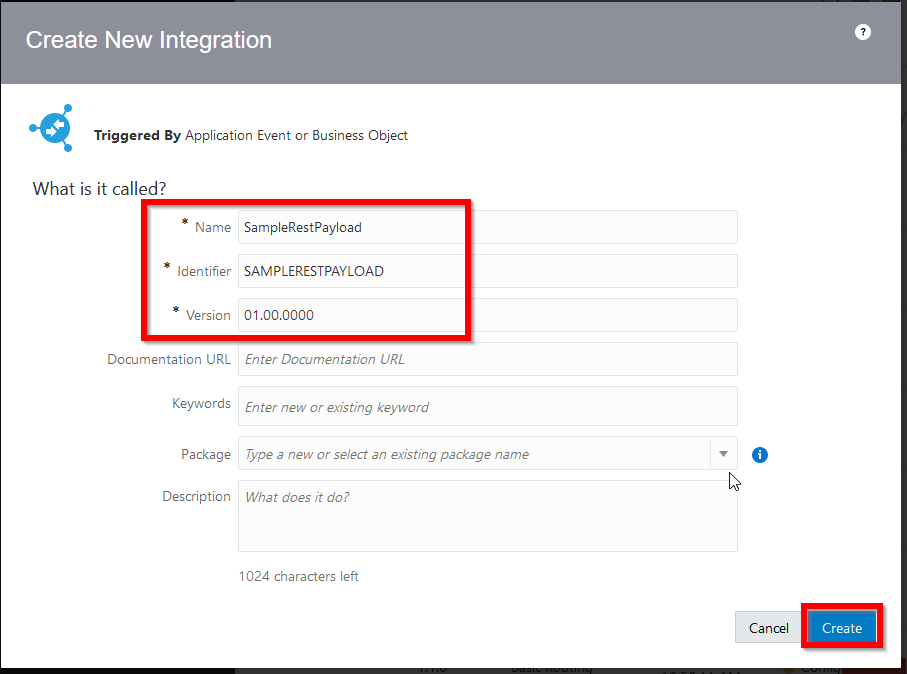
Give it an appropriate name, and either populate the identifier and version fields, or let the application fill those in before selecting create
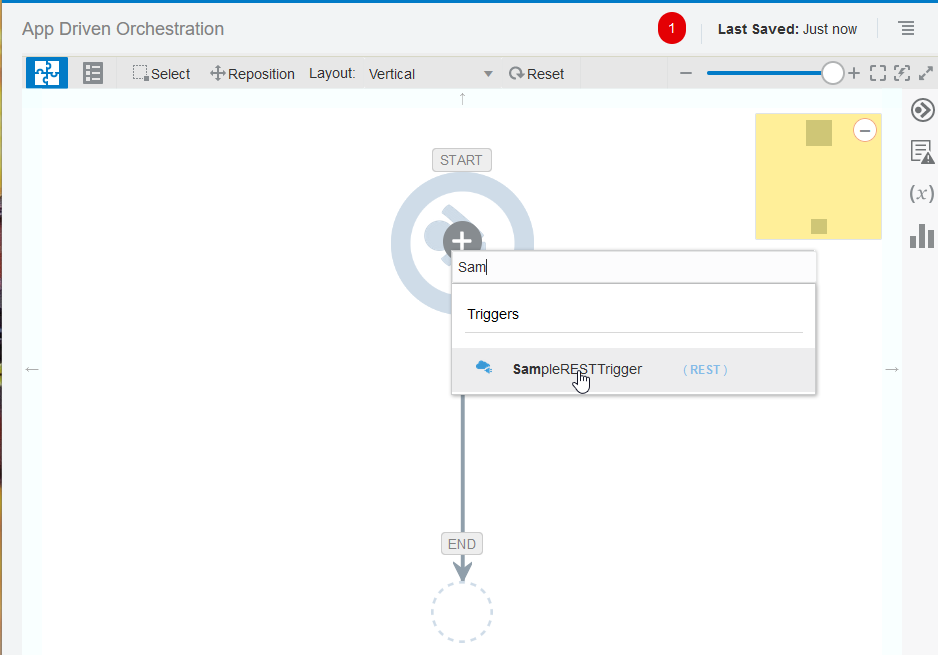
When the orchestration pallet opens, select any REST trigger - remember, for triggers the REST connection is really ust a placeholder. We define all the important pieces within the orchestration
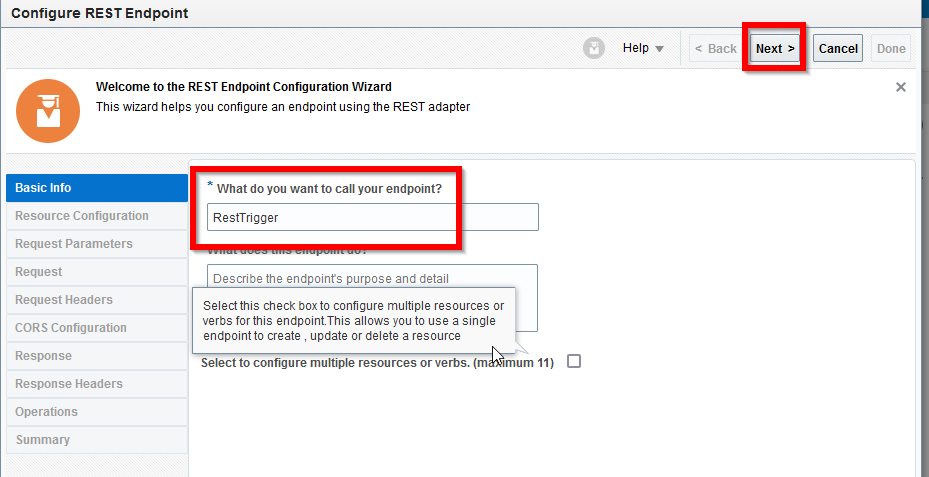
This will open the Configure REST endpoint dialogue box where we will configure the payload. First, give the endpoint a name and click next
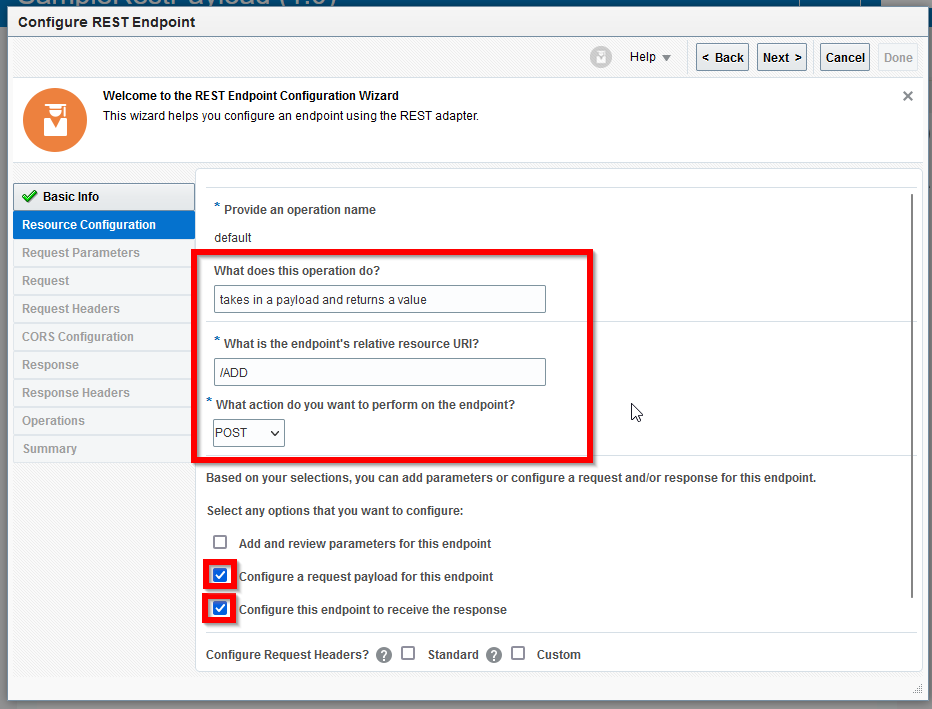
Under resource Configuration, define the relative URI and the action, then configure the orchestration to take in a rest payload and to provide a response. Note on this screen that if you leave the action as a get, you CANNOT define a request payload for this. That logically makes sense. If you are running a GET rest, you would not need to provide a payload. You would instead take in information in the form of template or query parameters, since you would be querying information about a specific object, or using query parameters to filter the results of multiple objects.
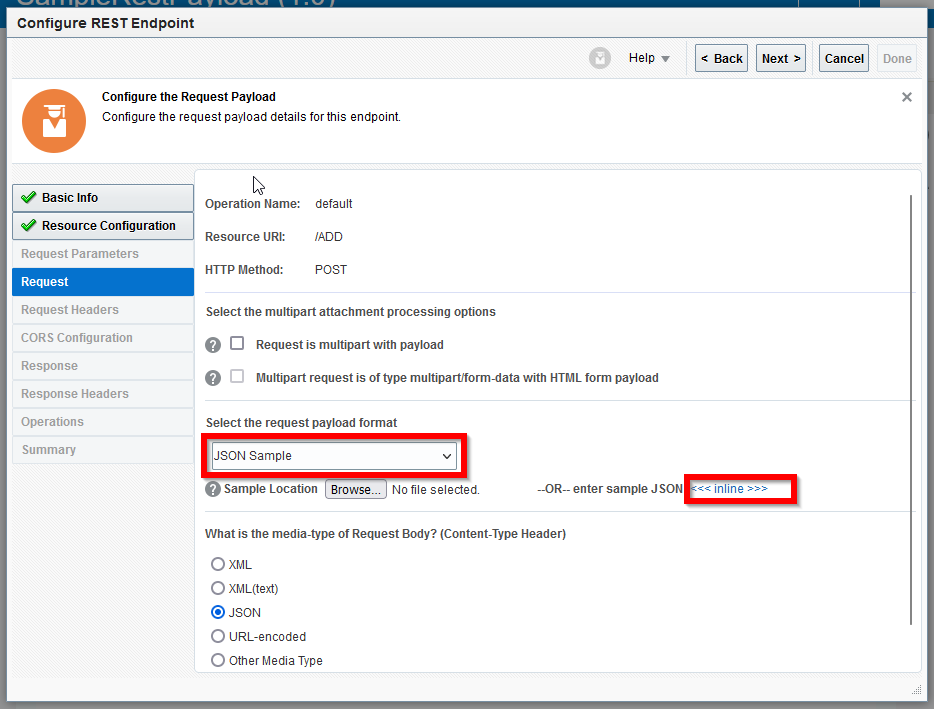
Based on the selections we chose on the previous screen the next tab the wizard jumps to is the request screen. Under the payload format, select JSON Sample and then click on inline to enter a sample payload. There are multiple ways to do this, so if you have XML schema or and XML sample, you can enter the information that way as well. If you do have sample data, make sure that any repeating elements are shown in that sample, otherwise OIC will assume the elements do NOT repeat.
Enter the following JSON and click OK. This is a simple payload that takes in 2 attributes, number 1 and number 2. In the remaining steps, we will add these 2 numbers together and return that total to the user in a response payload.
{
"Number1": "1",
"Number2": "1"
}
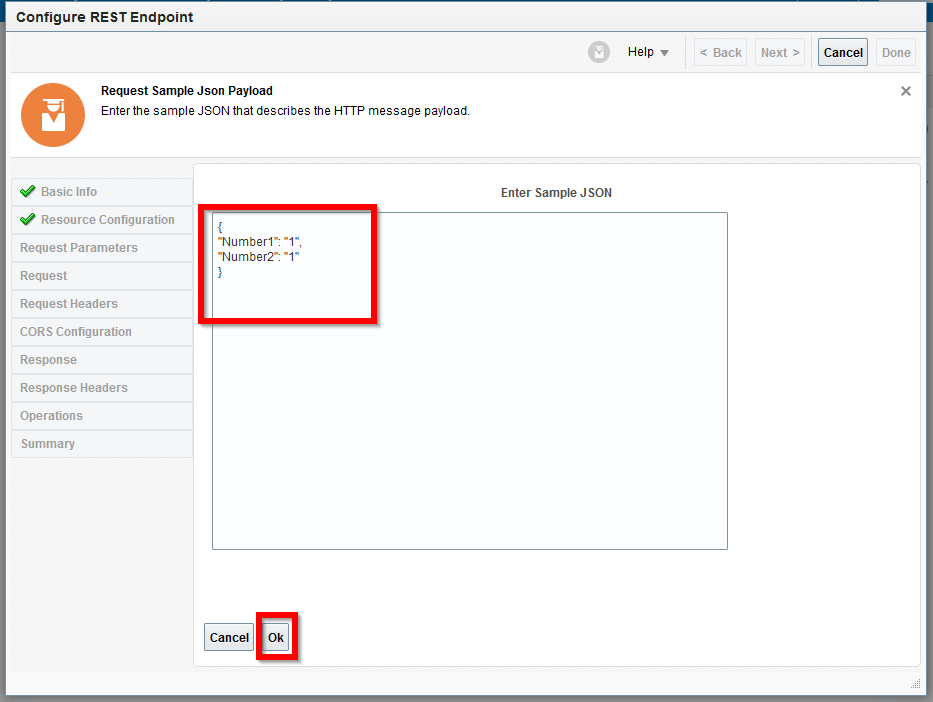
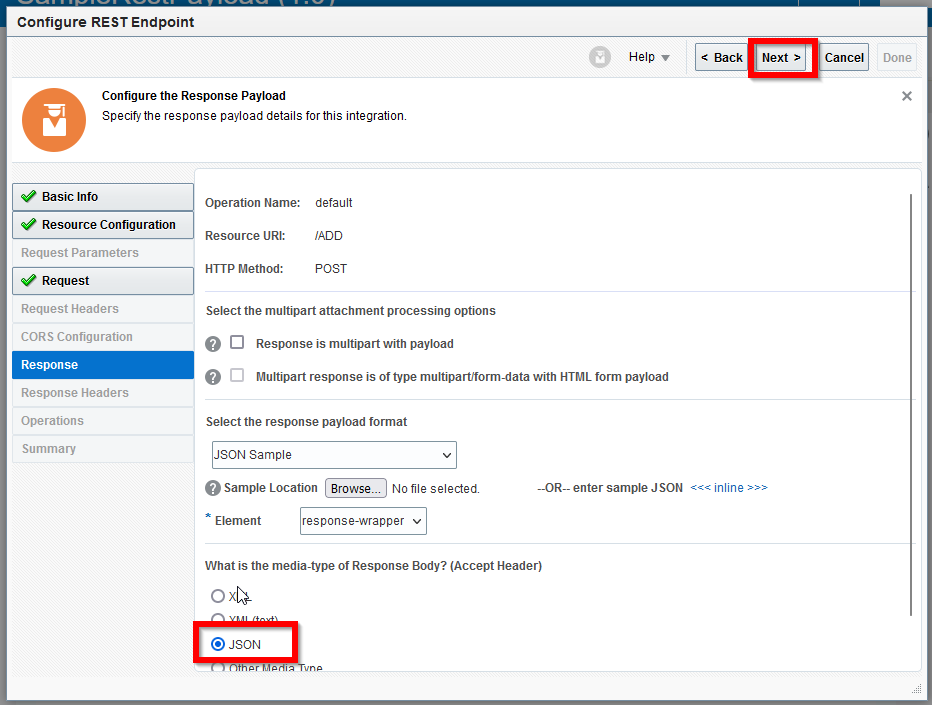
With the JSON in the previous setp verified, select a media type of JSON and click NEXT
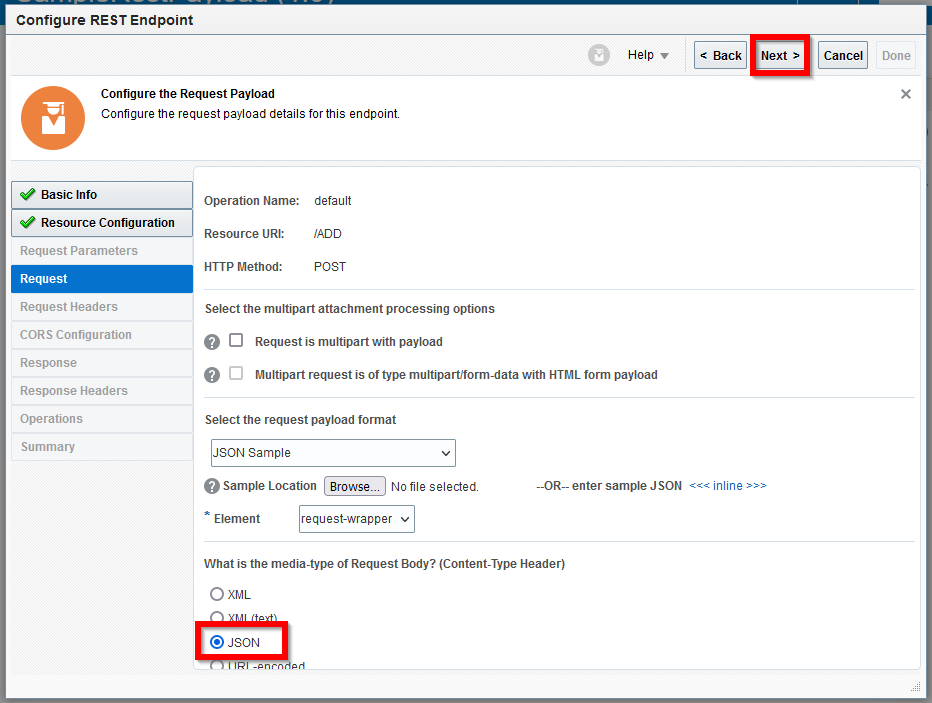
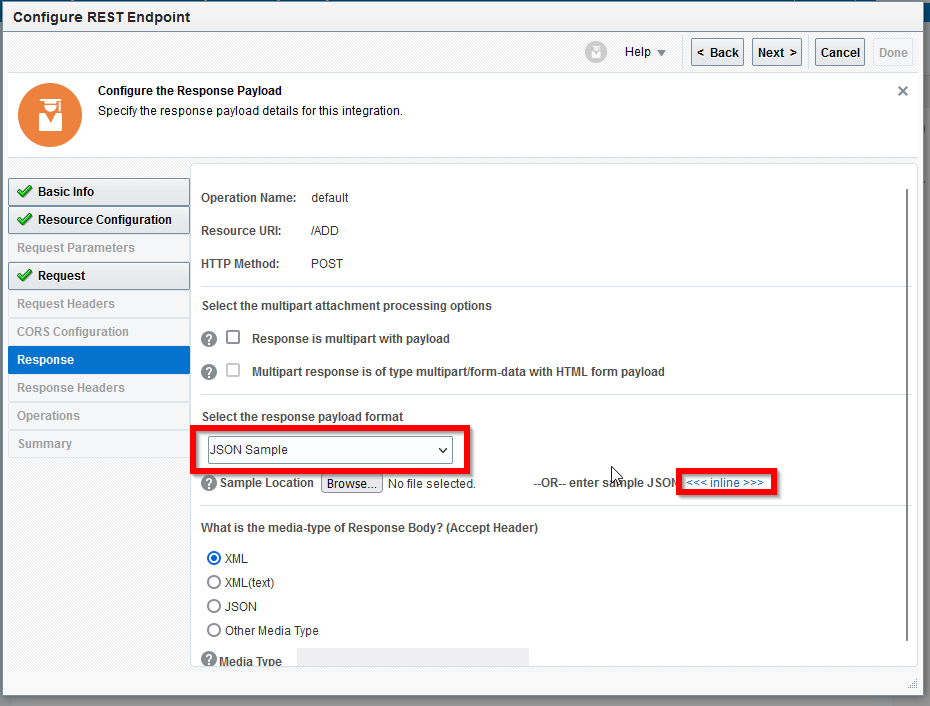
Now, we will enter a response. Entering a response is not required, but it will help us illustrate what we can do with payload attributes in this example. If we were creating a PUT method, we wouldn't necessarily need to return any data to the invoking system, except a 200 OK success message. However, in most cases, you will probably be passing some information back to the user other than just a success message.
Similar to the previous screen, select JSON sample and select inline to enter the response payload we will send back.
Enter the following JSON and click OK
{
"Total":"2"
}
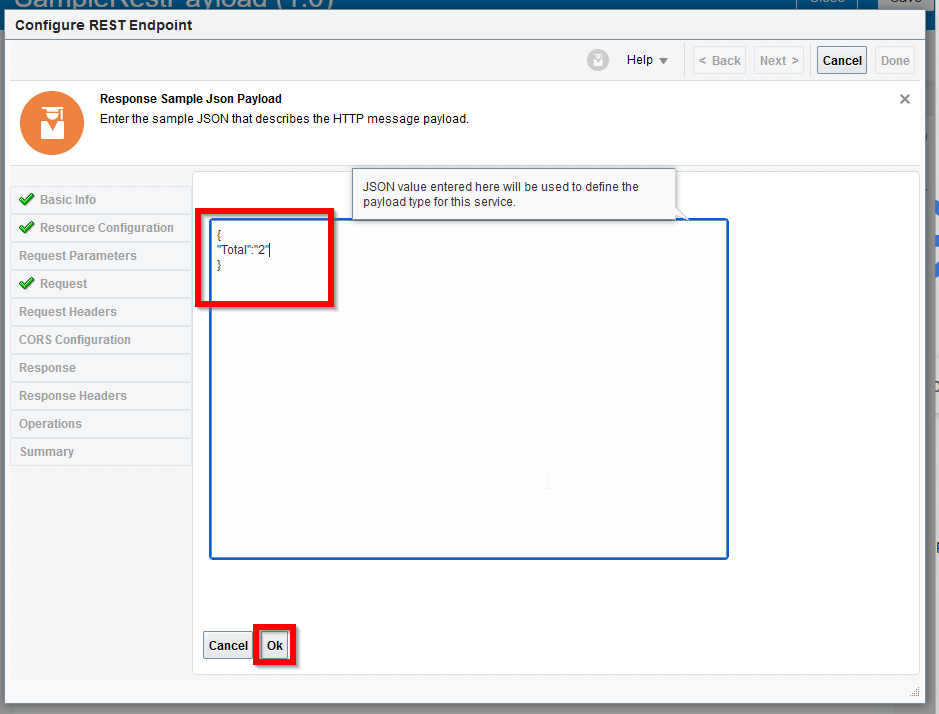
Again, click JSON and next to move to the summary screen
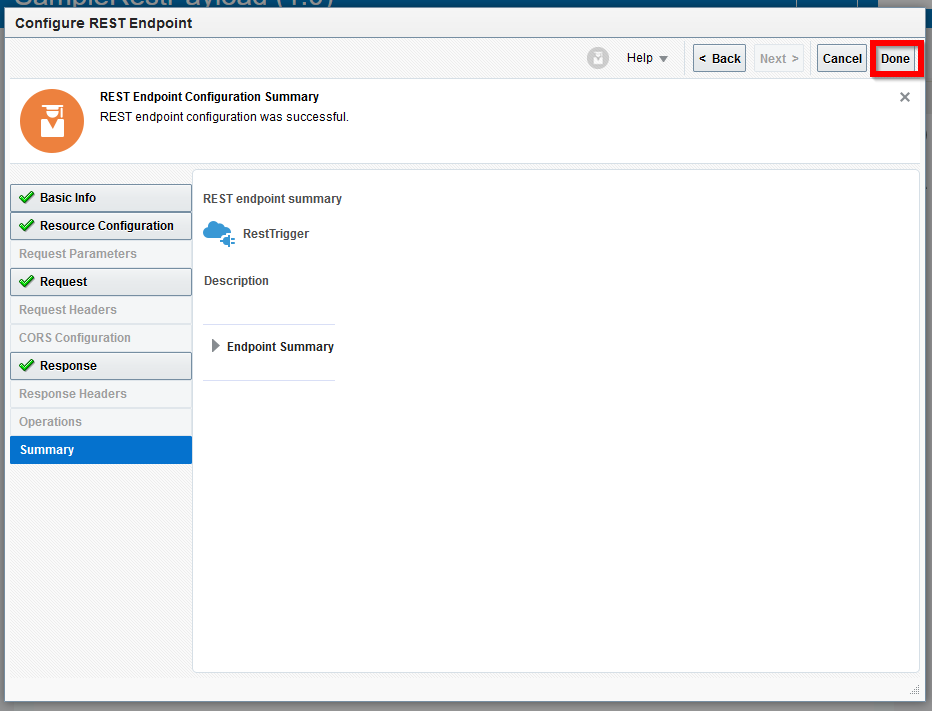
On the summary screen, click Done
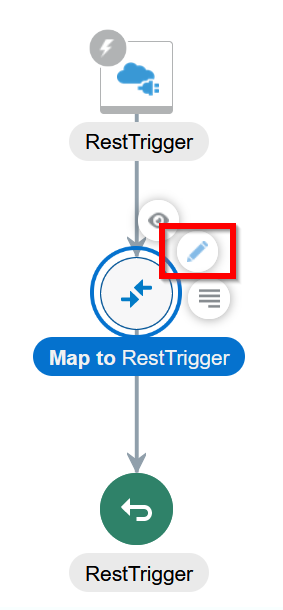
Now that we defined a response, we need to define what values will be assigned to the "Total" attribute that we are including the web service response. Click to edit the mapping
Now in the mapping section we can see all the attributes that we defined in the JSON samples we entered. *Note that you may need to
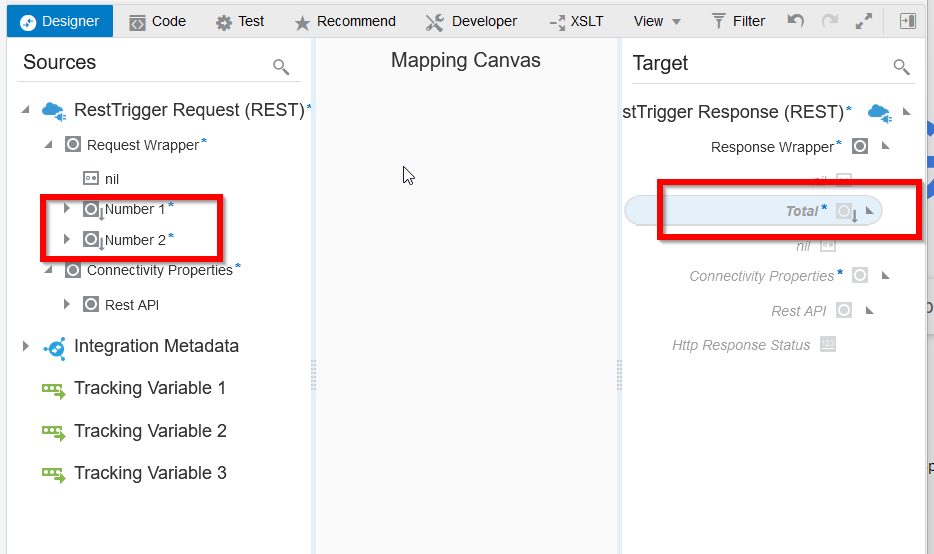
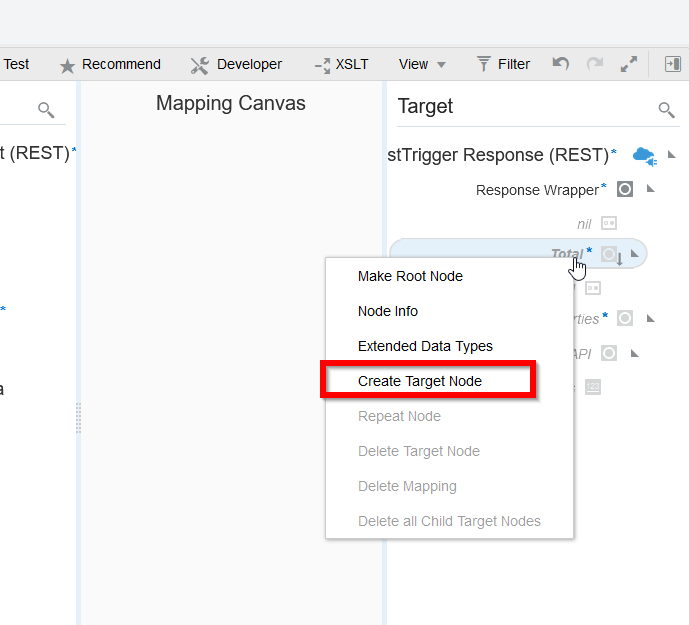
On the Total attribute, right click and select create target node
This will open an expression editor for that attribute in view only mode. First, click on the tool icon on the right to toggle this into edit mode from view only. And next drag the Number1 attribute from the left side into the expression editor.
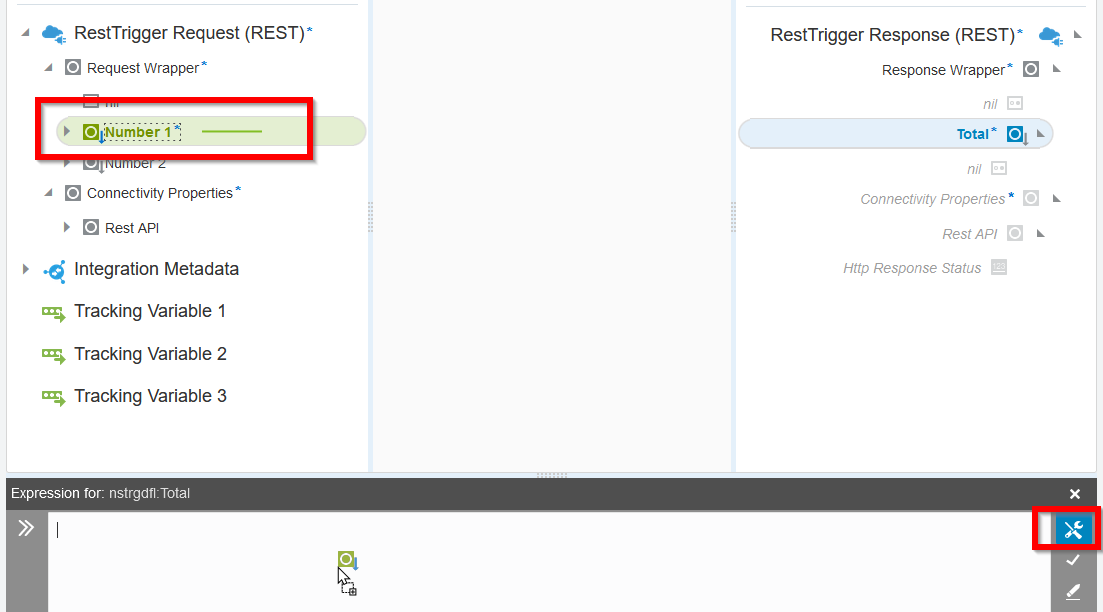
That should populate the full OIC path for that attribute into the editor

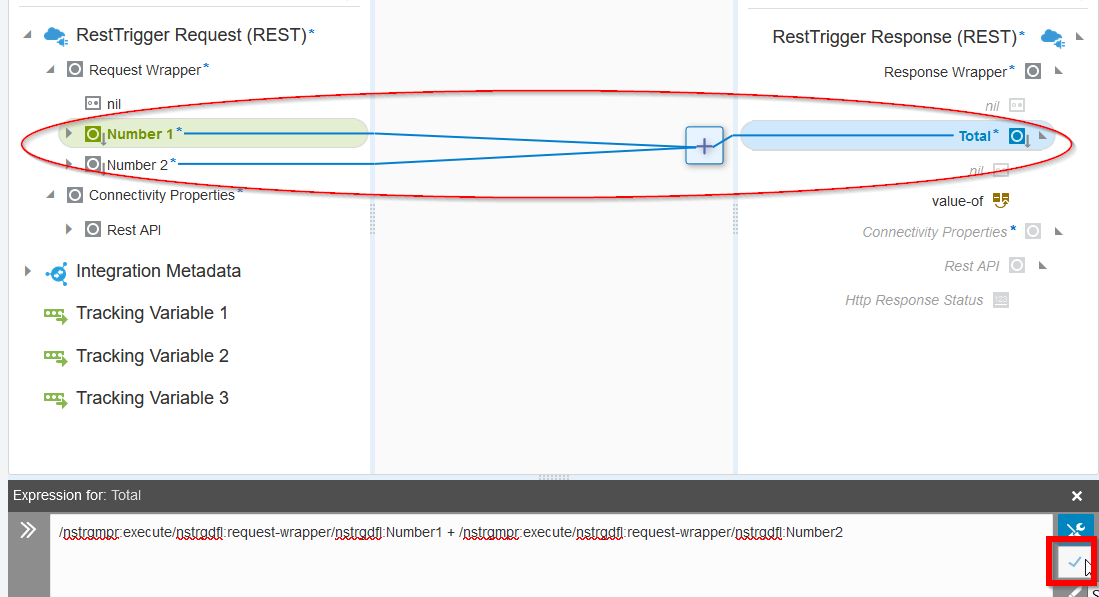
Place a plus sign after that and then drag the second attribute into the editor so that it looks like this

Now if you click on the validation button (the check box on the right), you should see the mapping in the mapping pallet visually links Number1 and Number2 into the total attribute
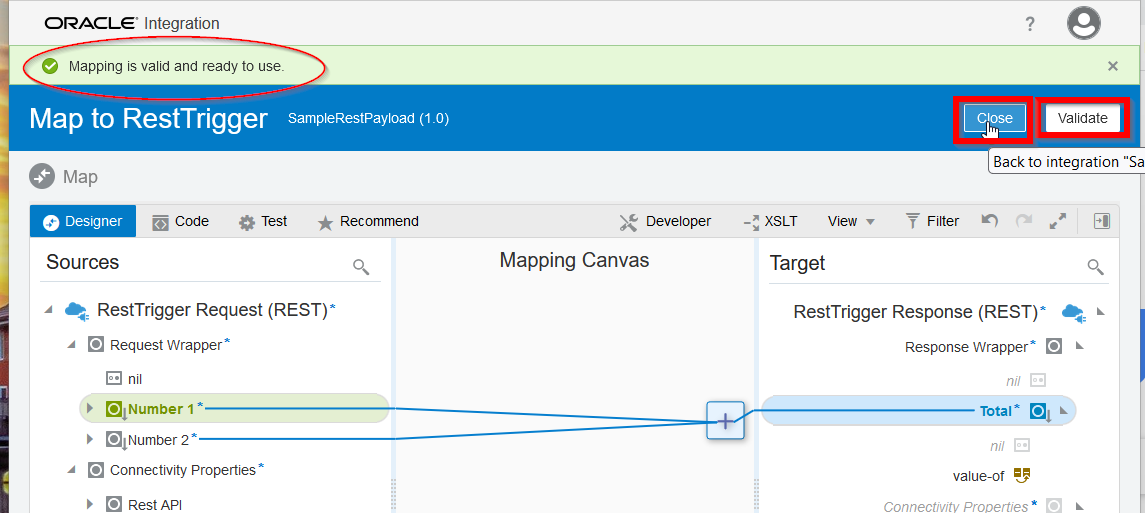
Click on Validate, and once that completes, you should see a message stating that the 'Mapping is ready to use' and you can click close
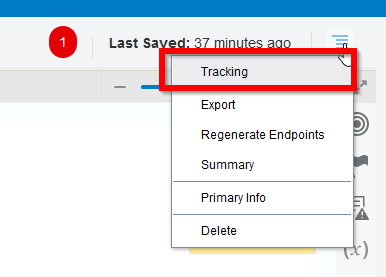
Lastly, we will need to click on tracking and drag an identifier into the tracking pane
You can drag any fields that will identify a specific instance of this orchatration. Here, I added Number1 and Number2 as tracking attributes
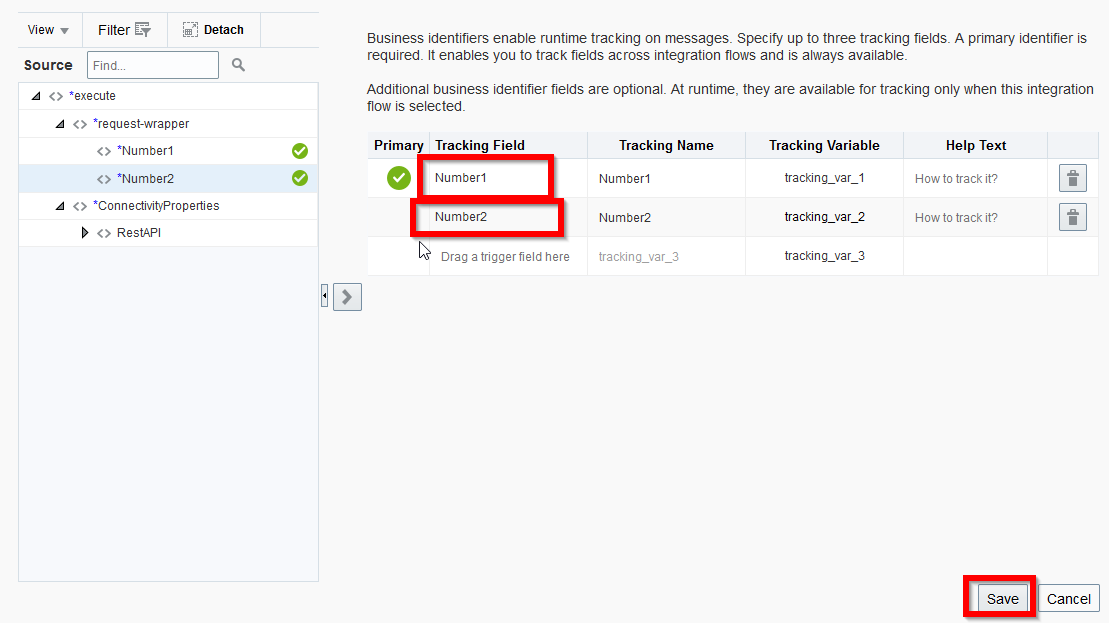
Now you can save the orchestration, and once you see a success message you can close the integration

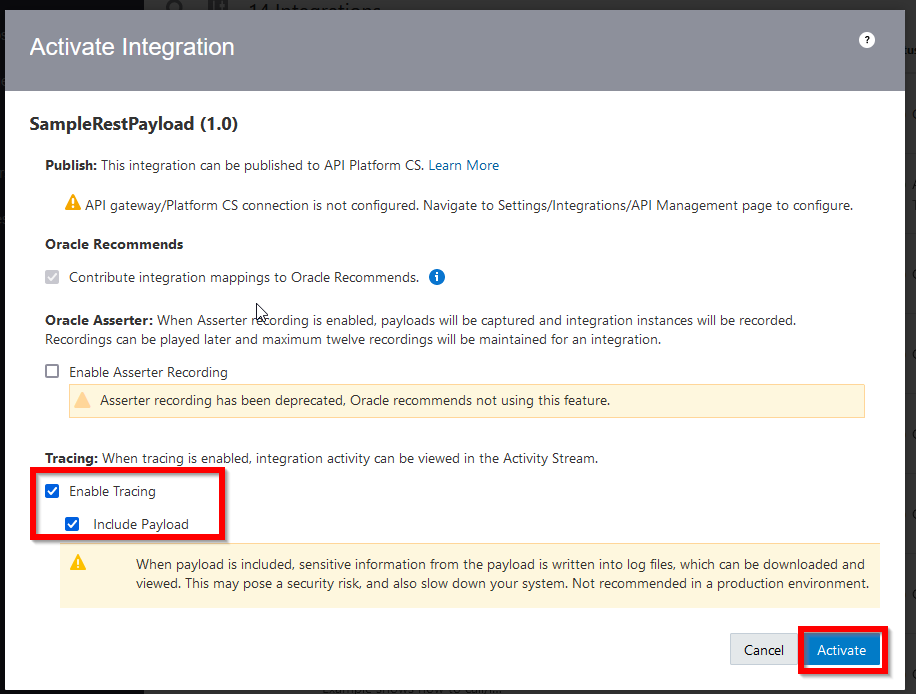
With the orchastratoin validated, we can activate it

Make sure to enable tracing and include the payload, then click activate.
Once that activates, you can click on the run button and then the metadata URL to get the full PUT URI
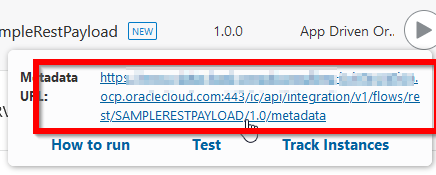
That will give you the full endpoint along with some other information like the payload which you can copy

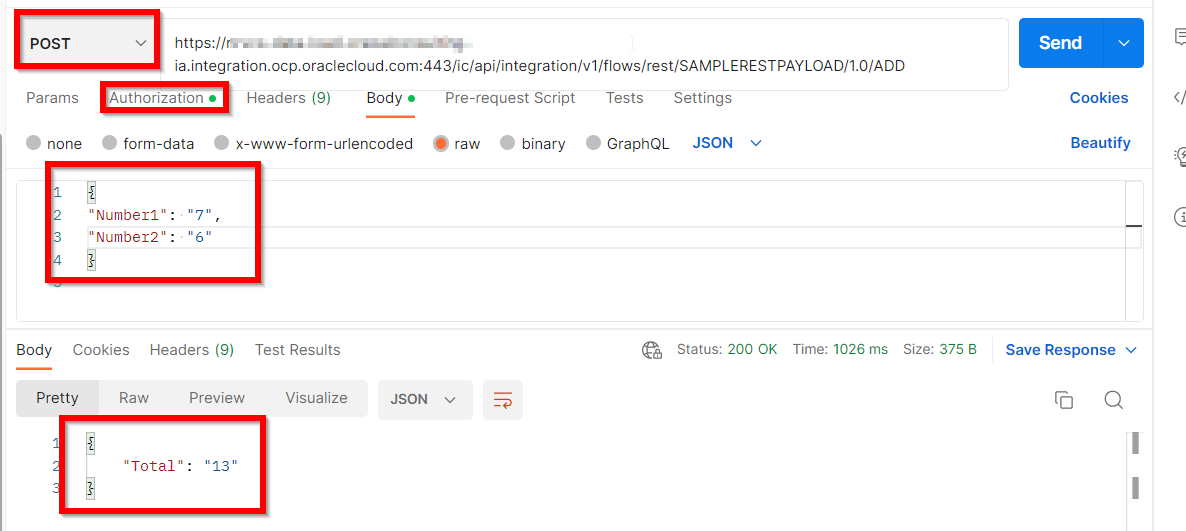
Copy that URL, and enter it in a tool like Postman. You'll need to set the action to POST, enter in a JSON with two number attributes, and set your authorization to your username and password that you use to log into OIC, you should get a response that looks like the image below. You can see the orchestration is taking in two variables, adding them together and returning the total value.